Craving a rich, creamy dessert without turning on your oven? This no-bake mini cheesecake recipe is your answer. It’s incredibly simple, requires minimal effort, and delivers perfectly portioned treats that are guaranteed to impress. Whether you need a quick dessert for a party or a simple indulgence for yourself, these little cheesecakes are foolproof.
We’re talking a buttery graham cracker crust topped with a smooth, tangy cream cheese filling. They set up beautifully in the fridge, making them the ultimate make-ahead dessert. Let’s get started on what will surely become your new favorite sweet treat.
Why This No-Bake Mini Cheesecake Recipe is a Must-Try
You’ll fall in love with this recipe for so many reasons. First, the simplicity is unmatched. There’s no water bath, no worrying about cracks, and no need to heat up your kitchen. It’s a straightforward mix-and-chill process.
Second, they are perfectly portioned. Individual desserts always feel a little more special, and they are incredibly easy to serve to guests. Plus, you can customize each one with different toppings, so everyone gets their favorite flavor combination.

Finally, the texture is divine. The filling is light yet rich, creamy, and perfectly balanced against the crunchy, buttery crust. For a similar vibe with a fruity twist, you might also love these delicious raspberry cheesecake bars.
Key Ingredients for Perfect Mini Cheesecakes
The beauty of this recipe lies in its simple, accessible ingredients. You probably have most of what you need in your pantry and refrigerator right now.
For the Graham Cracker Crust
- Graham Cracker Crumbs: The classic foundation. You can crush your own crackers or buy pre-made crumbs to save time.
- Unsalted Butter: Melted butter binds the crumbs together to create a firm, delicious base.
- Granulated Sugar: A touch of sugar adds sweetness and helps the crust crisp up in the fridge.
For the Creamy Cheesecake Filling
- Cream Cheese: Use full-fat, block-style cream cheese, and make sure it’s fully softened to room temperature to avoid lumps.
- Powdered Sugar: This dissolves easily into the filling, ensuring a smooth, velvety texture.
- Heavy Whipping Cream: Whipped to stiff peaks, this is the secret to a light, airy, and stable filling.
- Lemon Juice: A splash of fresh lemon juice brightens the flavor and cuts through the richness of the cream cheese.
- Vanilla Extract: A teaspoon of pure vanilla extract adds essential aromatic depth.
How to Make No-Bake Mini Cheesecakes (Step-by-Step)
Follow these simple steps to create your own delicious no-bake mini cheesecake cups. It’s as easy as mix, press, and chill!
Step 1: Prepare the Crust
First, line a 12-cup muffin tin with paper liners. In a medium bowl, combine the graham cracker crumbs, granulated sugar, and melted butter. Mix with a fork until all the crumbs are evenly moistened. Press about 1.5 tablespoons of the mixture firmly into the bottom of each liner. You can use the bottom of a small glass or a spice jar to pack it down tightly. Place the muffin tin in the freezer to set the crust while you prepare the filling.
Step 2: Make the Filling
In a large mixing bowl, beat the softened cream cheese with an electric mixer on medium speed until it’s completely smooth and creamy. Scrape down the sides of the bowl. Add the powdered sugar, lemon juice, and vanilla extract, and beat again until everything is well combined and smooth.

In a separate bowl, whip the heavy cream on high speed until stiff peaks form. Be careful not to over-whip. Gently fold the whipped cream into the cream cheese mixture in two or three additions until it’s uniform and airy. If you love easy, creamy desserts, you have to try this amazing peach cobbler cheesecake next!
Step 3: Assemble and Chill
Remove the muffin tin from the freezer. Spoon or pipe the cheesecake filling evenly over the prepared crusts, filling each liner to the top. Smooth the tops with a small spatula or the back of a spoon. Cover the tin with plastic wrap and refrigerate for at least 4 hours, or preferably overnight, until the cheesecakes are firm.
Creative Topping Ideas
The fun of these no-bake mini cheesecakes is in the toppings! Once they are fully set, you can get creative. Here are a few ideas to get you started:
- Fruit: Fresh berries, a spoonful of cherry or strawberry pie filling, or a simple raspberry coulis.
- Chocolate: A drizzle of melted chocolate, a dollop of hot fudge, or a sprinkle of mini chocolate chips. For true chocolate lovers, these loaded brownie cheesecake cups (coming soon) are a dream.
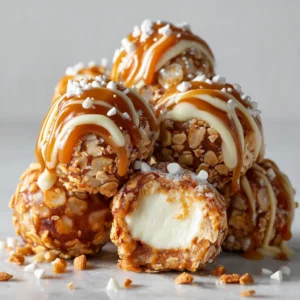
- Caramel: A generous drizzle of salted caramel sauce and a sprinkle of sea salt.
- Crunch: Toasted coconut flakes, chopped nuts like pecans or walnuts, or crushed Oreo cookies.
Pro Tips for Cheesecake Success
- Room Temperature is Key: Ensure your cream cheese is completely softened. This is the most important step for achieving a silky-smooth, lump-free filling.
- Don’t Overmix: When folding in the whipped cream, be gentle to maintain the airy texture you worked to create.
- Chill Thoroughly: Be patient! The cheesecakes need adequate time in the refrigerator to set properly. Rushing this step will result in a soft, runny filling.
- Easy Removal: Using paper liners in your muffin tin makes it incredibly easy to remove and serve the cheesecakes without any mess.
Storing Your Mini Cheesecakes
You can store any leftover mini cheesecakes in an airtight container in the refrigerator for up to 5 days. For longer storage, they freeze beautifully. Place the cheesecakes on a baking sheet and freeze until solid, then wrap each one individually in plastic wrap and store in a freezer-safe bag or container for up to 3 months. Let them thaw in the refrigerator for a few hours before serving.
Frequently Asked Questions
Yes, they freeze very well. Once they are fully set, you can freeze them for up to 3 months. Thaw them in the refrigerator for a few hours before serving for the best texture.
Yes, this is a perfect make-ahead dessert. You can prepare them up to 2 days in advance and keep them covered in the refrigerator. Just wait to add any fresh fruit toppings until you’re ready to serve.
Absolutely! You can easily substitute the graham cracker crumbs with crushed Oreo cookies (no need to remove the filling), Biscoff cookies, or shortbread cookies for a different flavor profile.
The two most important steps are to use full-fat, block-style cream cheese (not the spreadable kind in a tub) and to whip the heavy cream to stiff peaks. Also, ensure you chill the cheesecakes for the recommended amount of time.
For the best results, they need to chill in the refrigerator for at least 4 hours. However, letting them set overnight will give you the firmest texture and best flavor.
The Perfect Party Dessert
These no-bake mini cheesecakes are the ultimate dessert for any gathering. They are easy to make ahead, simple to serve, and endlessly customizable. Share your creations with us on Pinterest—we can’t wait to see your favorite topping combinations!

The Recipe
No-Bake Mini Cheesecakes: The Easiest Treat Ever
Ingredients
Equipment
Instructions
- Line a 12-cup standard muffin tin with paper liners.
- In a medium bowl, combine the graham cracker crumbs, granulated sugar, and melted butter. Mix until all crumbs are evenly moistened.
- Press approximately 1.5 tablespoons of the mixture firmly into the bottom of each paper liner. Place the pan in the freezer while you prepare the filling.
- In a large bowl, beat the softened cream cheese with an electric mixer on medium speed until completely smooth. Add the powdered sugar, lemon juice, and vanilla extract, and beat again until smooth.
- In a separate chilled bowl, whip the cold heavy cream on high speed until stiff peaks form.
- Gently fold the whipped cream into the cream cheese mixture until just combined and no streaks remain.
- Spoon or pipe the filling evenly over the chilled crusts in the muffin tin.
- Cover the muffin tin with plastic wrap and refrigerate for at least 4 hours, or overnight, until the cheesecakes are firm and set.
- Once set, top with your favorite toppings and serve cold.
Notes
Freezing: Cheesecakes can be frozen for up to 3 months. Thaw in the refrigerator before serving.