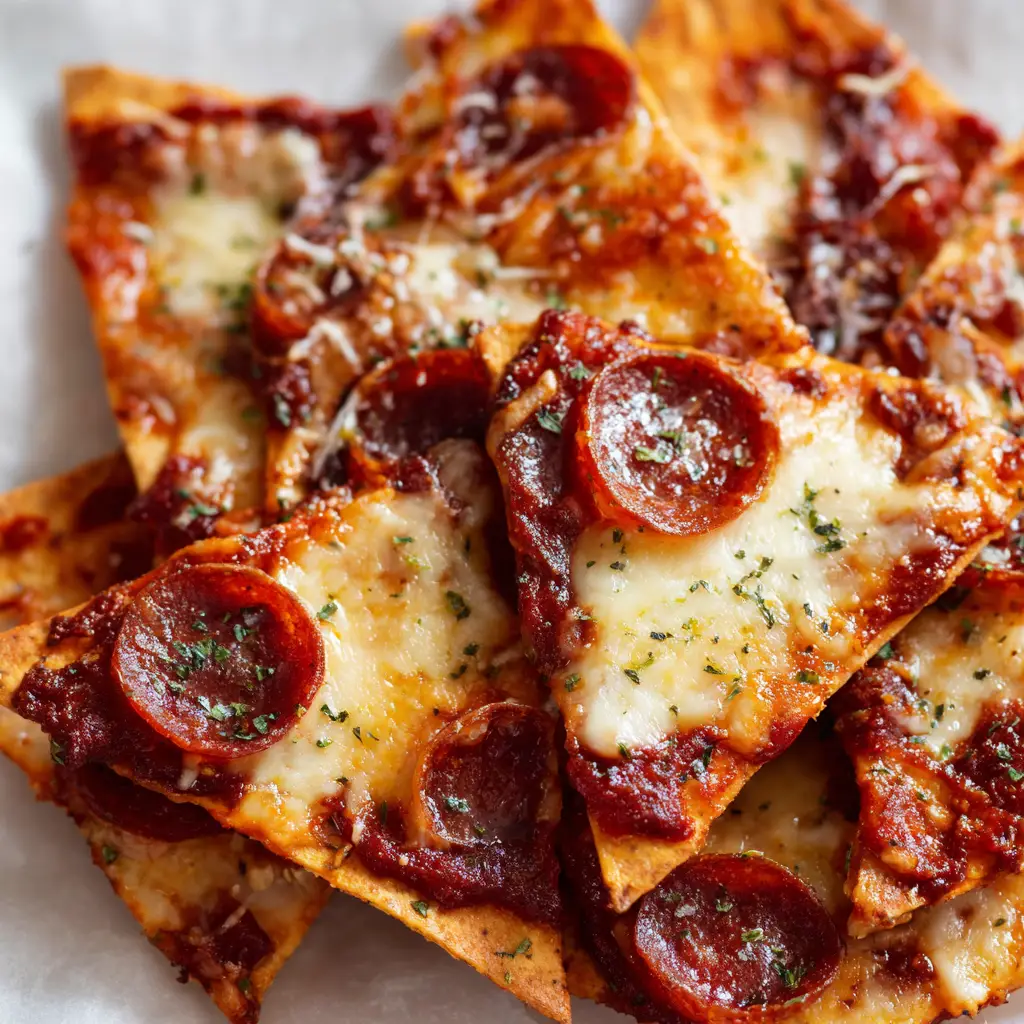
Forget everything you thought you knew about bland crackers and dip. We are about to transform your snacking world with these unbelievably delicious Crispy Pizza Chips. Imagine, a close-up of perfectly baked, golden-brown triangles, each one a miniature pizza masterpiece. This isn’t just a recipe; it’s a blueprint for the perfect bite.
Each chip is a crunchy raft of toasted pita, generously coated in a thick, dark red marinara, and buried under a blanket of gooey, melted mozzarella cheese, blistered to perfection with beautiful browned spots. We finish it with crispy, curled mini pepperoni and a final dusting of aromatic oregano. This is the snack you’ll make again and again.
Why You’ll Love These Irresistible Pizza Chips
These Crispy Pizza Chips are more than just a quick snack; they’re a flavor-packed experience. Here’s what makes them truly exceptional:
- Perfectly Engineered Crunch: We toast the pita triangles first to create a sturdy, shatteringly crisp base that stands up to all the toppings without getting soggy.
- Gooey, Blistered Cheese: Using low-moisture, whole-milk mozzarella is key. It melts beautifully, creating those coveted cheesy pulls and browned, flavorful spots just like your favorite pizzeria.
- Crispy, Cupped Pepperoni: Each mini pepperoni slice curls into a tiny, crispy bowl, its edges slightly charred to concentrate that savory, spicy flavor in every bite.
- Quick and Effortlessly Easy: From start to finish, you’re less than 20 minutes away from pizza perfection. It’s the ideal recipe for last-minute cravings or unexpected guests.
The Anatomy of the Perfect Pizza Chip
The magic of this recipe lies in its simplicity and the quality of its components. Each ingredient plays a crucial role in achieving that perfect visual and textural harmony.
For the Crispy Pita Base
- Pita Bread: 4 rounds of pita bread, preferably pocketless. This is our canvas, which will transform into golden-brown, toasted triangles perfect for holding toppings.
- Extra Virgin Olive Oil: 2 tablespoons (30ml). This is essential for achieving that even, golden-brown color and satisfying crunch during baking.
- Garlic Powder & Salt: ½ teaspoon of each. These foundational seasonings infuse the base with a subtle, savory flavor that complements the pizza toppings.
For the Classic Pizza Toppings
- Thick Marinara Sauce: ¾ cup (180ml). Use a thick, high-quality sauce. A watery sauce will make the chips soggy, so consistency is key for that rich, dark red layer.
- Shredded Low-Moisture Mozzarella: 2 cups (200g). Do not use fresh mozzarella. The low-moisture variety is scientifically engineered for that perfect melt, gooeyness, and those beautiful blistered brown spots.
- Mini Pepperoni Slices: ½ cup (70g). These are non-negotiable for achieving the “crispy curled” visual. As they bake, they’ll cup up, and their edges will char slightly for an intense flavor.
- Dried Oregano: 1 teaspoon (1.5g). This final dusting adds that classic, aromatic pizza parlor scent and a final layer of herbaceous flavor.
Essential Tools for Maximum Crispiness
You don’t need any fancy equipment to bring these Crispy Pizza Chips to life. Here are the kitchen staples that will ensure your success.
- Baking Sheet: A large, rimmed baking sheet provides the perfect surface for spreading out the chips in a single layer, ensuring they bake evenly.
- Parchment Paper: This prevents the cheese from sticking to the pan and makes cleanup incredibly easy. It’s the secret to a stress-free snacking experience.
- Pizza Cutter or Sharp Knife: For quickly and evenly cutting the pita bread into perfect triangles.
- Pastry Brush: Ideal for applying a thin, even layer of olive oil to the pita, guaranteeing every chip gets equally golden and crisp.
Bringing Your Crispy Pizza Chips to Life, Step-by-Step
Follow these instructions closely to replicate the visually stunning and delicious results. We’re focusing on technique to build layers of flavor and texture.
Step 1: Create the Golden Pita Foundation
First, preheat your oven to 400°F (200°C). While it heats, cut each pita bread into 8 uniform triangles. In a small bowl, whisk together the extra virgin olive oil, garlic powder, and salt. Spread the pita triangles in a single layer on your parchment-lined baking sheet and brush them lightly with the seasoned oil.
Bake for 5-6 minutes. You’re looking for the edges to become a light golden-brown. This initial bake is the most critical step to ensure a truly crispy, never-soggy chip.
Step 2: Assemble Your Miniature Pizza Masterpieces
Remove the baking sheet from the oven. Working quickly, spread a thin layer of the thick marinara sauce over each toasted pita chip. Be careful not to overload them. A thin, rich layer is all you need.
Generously sprinkle the shredded mozzarella cheese over the sauce, ensuring each chip is heavily topped. Now, strategically place the mini pepperoni slices across the melted cheese.
Step 3: The Final Bake for Bubbly, Blistered Perfection
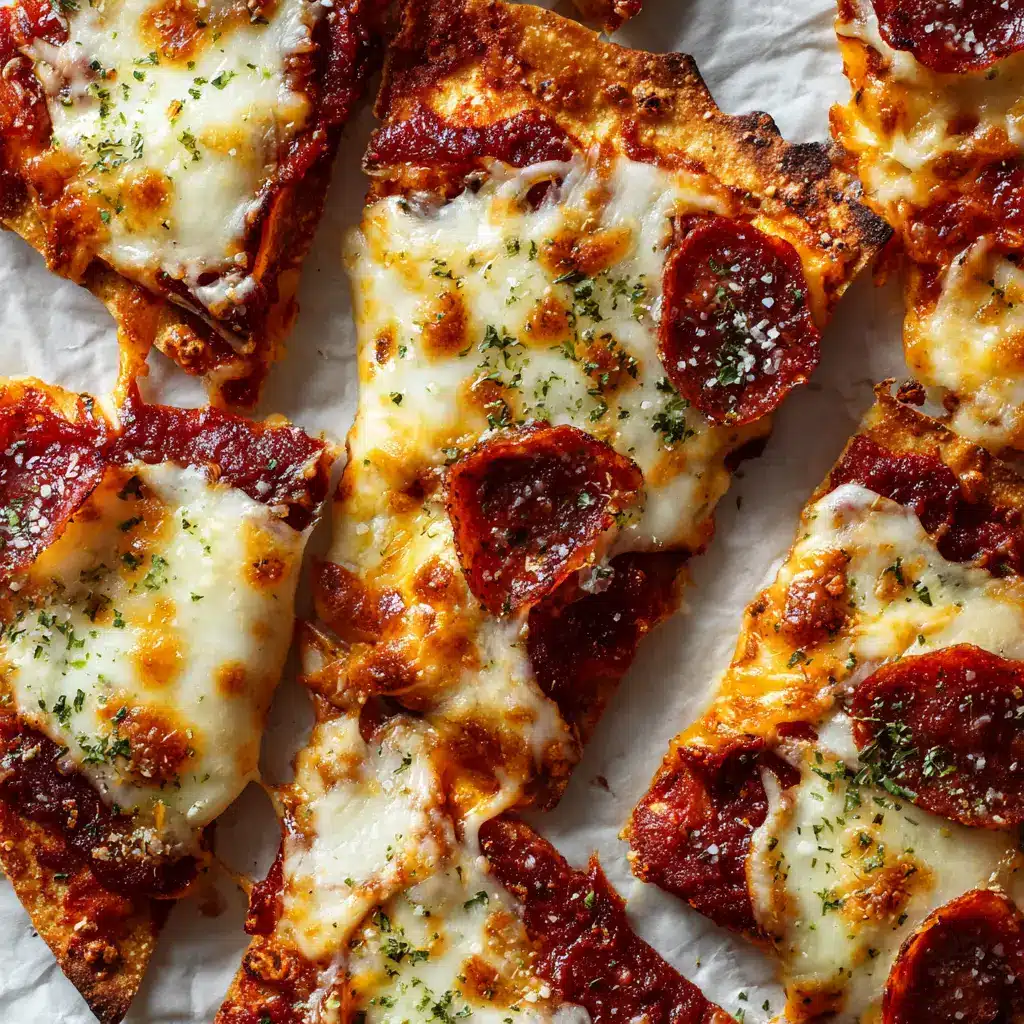
Return the baking sheet to the oven and bake for another 5-7 minutes. You’re watching for specific visual cues: the cheese should be fully melted, bubbly, and developing those beautiful browned spots. The mini pepperonis will be curled and their edges slightly charred.
For an extra blistered finish, you can switch the oven to the broil setting for the final 30-60 seconds. Watch it like a hawk, as it can go from perfect to burnt in an instant!
Step 4: The Aromatic Finishing Touch
Once they’re out of the oven, immediately sprinkle the dried oregano over the hot chips. This releases the herb’s essential oils, creating an incredible pizza parlor aroma. Let them cool for just a minute or two before serving hot.
Pro Secrets for Unforgettable Pizza Chips
Keep these expert tips in mind to nail the recipe every single time.
- Don’t Skip the Pre-Bake: Toastin the pita chips with seasoned oil before adding toppings is the secret to a sturdy, crispy base that never gets soggy.
- Thick Sauce is a Must: A watery marinara will steam the pita. A thick, concentrated sauce adds intense flavor without compromising the crunch.
- Embrace the Broiler: For those authentic, pizzeria-style browned and blistered cheese spots, a quick blast under the broiler is your best friend. Just be sure to watch it closely.
- Single Layer is Key: Do not overcrowd the pan. Give the chips space to breathe so the hot air can circulate, ensuring every single one is perfectly crispy.
Keeping the Crunch: Storage and Reheating Tips
While these Crispy Pizza Chips are best enjoyed fresh from the oven, you can store leftovers.
Let the chips cool completely, then store them in an airtight container at room temperature for up to 2 days. To reheat and revive the crunch, place them in an air fryer or a toaster oven at 350°F (175°C) for 2-3 minutes until the cheese is re-melted and the edges are crisp again.
Perfect Pairings for Your Pizza Chips
These chips are a fantastic standalone snack, but they also serve as a great side or starter. They pair wonderfully with a hearty Italian grinder salad for a full meal. For a comforting soup and “cracker” combo, serve them alongside a bowl of creamy chicken poblano soup.
They also make a great crunchy component on a larger appetizer spread, especially when balanced with something cool and fresh like a cool and creamy cucumber ranch salad.
Your Crispy Pizza Chip Questions, Answered
Yes! Finely diced bell peppers, onions, or mushrooms are great additions. Just be sure to pre-cook any raw vegetables to release their moisture before adding them to the chips to maintain crispiness.
Absolutely! This recipe works well with flour tortillas, naan bread, or even large crackers. You may need to adjust the initial baking time slightly depending on the thickness of your base.
Yes, they work wonderfully in an air fryer. Assemble as directed and cook at 375°F (190°C) for 3-5 minutes, or until the cheese is melted and bubbly. Cook in a single layer and work in batches.
The two most important steps are to pre-bake the pita chips with a light coating of oil and to use a very thick marinara sauce. A watery sauce will create steam and soften the chips.
Low-moisture, whole-milk mozzarella that you shred yourself is the best choice. It’s designed to melt perfectly with less oil separation, giving you that classic gooey texture and beautiful browned spots.
Ready to Bake? Here’s the Full Recipe
The Ultimate Crispy Pizza Chips: Your New Favorite Snack Obsession
Ingredients
Equipment
Instructions
- Preheat oven to 400°F (200°C). Cut each pita into 8 triangles. Whisk together olive oil, garlic powder, and salt. Arrange pita triangles on a parchment-lined baking sheet, brush with oil mixture, and bake for 5-6 minutes until light golden-brown.
- Remove from oven. Spread a thin layer of marinara on each chip. Top generously with shredded mozzarella, then arrange mini pepperoni slices on top.
- Return to the oven and bake for another 5-7 minutes, until cheese is melted, bubbly, and has browned spots. For extra blistering, broil for 30-60 seconds, watching carefully.
- Remove from the oven and immediately sprinkle with dried oregano. Let cool slightly before serving.
Notes
Use a thick marinara sauce to prevent sogginess.
Low-moisture mozzarella is essential for the best melt and browning.
Watch carefully if using the broiler as it works very fast.
More Than Just a Snack
These Crispy Pizza Chips are a testament to how simple ingredients can create something truly special. They are a guaranteed crowd-pleaser for game days, movie nights, or any time you need a quick and satisfying bite.
If you make this recipe, I’d love to see it! Share your creations on Pinterest and tell me what you think in the comments below. Your feedback helps our community of home cooks grow!