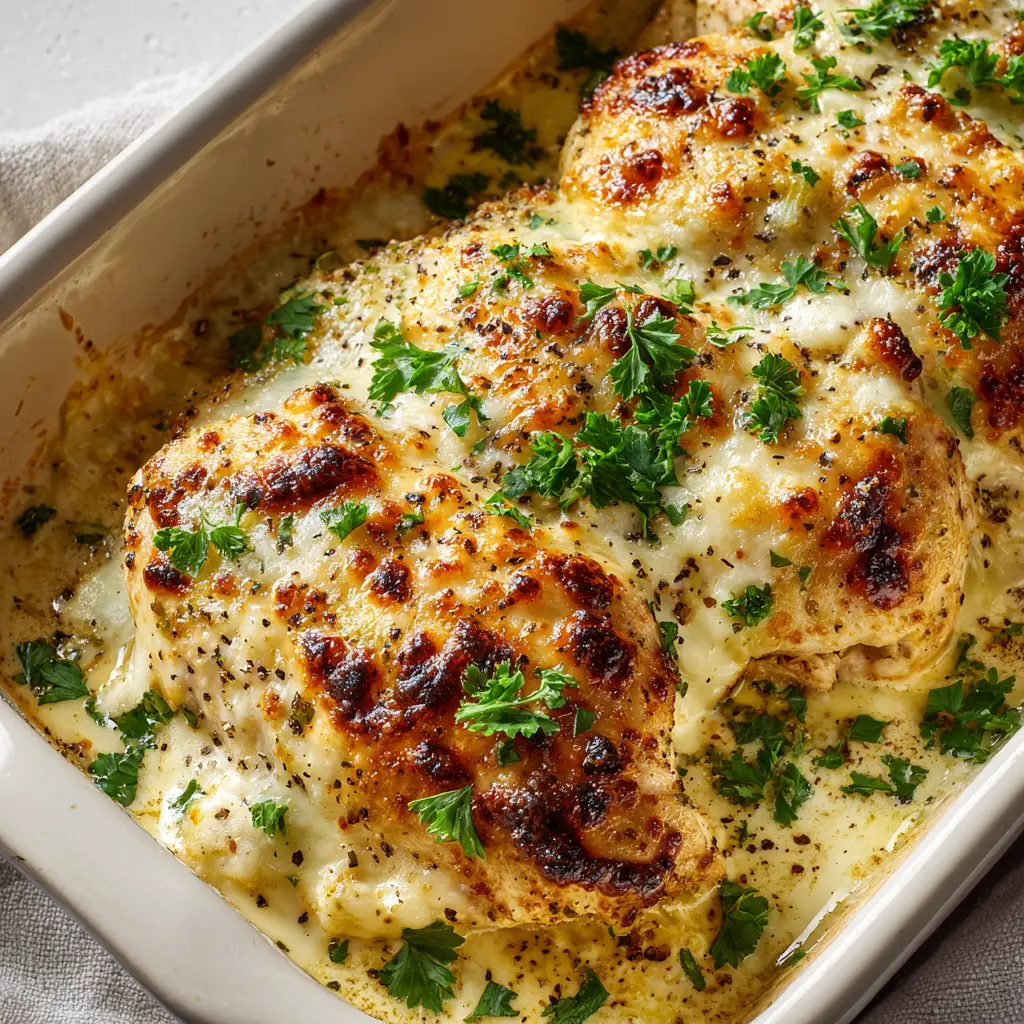
When it comes to comfort food that feels both sophisticated and deeply satisfying, few dishes rival the decadence of this Caesar Chicken. This isn’t just another weeknight poultry dish; it is a masterclass in texture and flavor layering, transforming humble chicken breasts into a gourmet experience. By combining a thick, opaque pale-yellow Caesar sauce with a duo of melted cheeses, we create a dish that is as visually stunning as it is delicious.
The beauty of Caesar Chicken lies in its simplicity and the scientific way the ingredients interact under high heat. Imagine thick, juicy chicken breasts acting as a sturdy foundation for a heavy, creamy sauce that infuses the meat with garlic and anchovy umami. This is then crowned with a bubbling layer of mozzarella and parmesan, finished with those signature golden-brown blistered spots that signify a perfect bake.
Whether you are hosting a dinner party or looking to upgrade your family meal rotation, this Caesar Chicken delivers a restaurant-quality result with minimal effort. The aroma of roasting garlic and toasted cheese will fill your kitchen, promising a meal that is rich, savory, and perfectly balanced by fresh herbal notes and a hit of coarse black pepper.
The Irresistible Appeal of This Baked Caesar Chicken Masterpiece
- Visual Perfection: This dish mirrors the high-end aesthetic of professional food photography, featuring a heavy, creamy pale-yellow sauce and beautifully charred cheese.
- Textural Contrast: You get the succulent, thick bite of the chicken breast paired with the silky smoothness of the Caesar dressing and the crispy, blistered cheese topping.
- Flavor Explosion: The combination of tangy Caesar notes, salty parmesan, and the mild stretch of mozzarella creates a complex flavor profile that appeals to all ages.
- Low Effort, High Reward: Designed for the busy home cook, this Caesar Chicken requires minimal prep but offers a stunning visual and culinary payoff.
Essential Components for Your Gourmet Caesar Chicken
Thick Chicken Breasts: You want substantial, boneless, skinless chicken breasts (approx. 8 oz / 225g each) to ensure they stay juicy during the high-heat baking process. Thick cuts provide the necessary structural base to hold the heavy layers of sauce and cheese described in our visual blueprint.
High-Quality Caesar Dressing: The foundation of our flavor is a thick, opaque pale-yellow Caesar sauce. Look for a refrigerated, cream-based dressing rather than a shelf-stable vinaigrette to achieve that signature heavy coating that stays put while baking.
Low-Moisture Mozzarella Cheese: 1 cup (115g) of shredded mozzarella provides the “stretch” and the base for those beautiful golden-brown blistered spots. Low-moisture cheese is crucial because it melts smoothly without releasing excess liquid that could thin our Caesar sauce.
Aged Parmesan Cheese: 1/2 cup (50g) of finely grated parmesan adds a sharp, salty punch and aids in the browning process. The proteins in parmesan undergo the Maillard reaction quickly, giving us those charred, savory bits seen in the professional visual prompt.
Fresh Italian Parsley: 2 tbsp (8g) of finely minced fresh green parsley leaves are essential for the final garnish. The vibrant green provides a necessary visual contrast against the pale sauce and golden cheese, lifting the entire presentation.
Coarse Cracked Black Pepper: Unlike fine table pepper, 1 tsp (2g) of coarse cracked peppercorns provides “specks” of visual interest and bursts of floral heat that cut through the richness of the dairy. This is a key sensory cue for the final dish.
Foundational Seasonings: You will also need 1 tbsp (15ml) of extra virgin olive oil for the ceramic dish and 1/2 tsp (3g) of kosher salt. While the dressing is salty, a light seasoning on the chicken itself ensures every layer is perfectly flavored.
Professional Equipment for the Perfect Bake
To achieve the look of a rustic yet elegant meal, use a rectangular white ceramic baking dish. Ceramic is an excellent heat conductor that ensures even cooking while providing a beautiful “oven-to-table” presentation. You will also need a sharp chef’s knife for finely mincing the parsley and a heavy-duty pepper grinder for those coarse black pepper specks.
Using a meat thermometer is highly recommended to ensure your Caesar Chicken reaches an internal temperature of 165°F (74°C) without overcooking. This keeps the thick breasts tender and juicy, contrasting perfectly with the heavy, baked-on sauce.
How to Master This One-Pan Caesar Chicken Masterpiece
Preparing the Chicken Foundation
Start by preheating your oven to 400°F (200°C). This high temperature is vital for creating the blistered cheese spots we desire. Pat 4 large chicken breasts (approx. 2 lbs / 900g total) completely dry with paper towels; this ensures the sauce adheres properly rather than sliding off due to surface moisture.
Lightly grease your white ceramic baking dish with olive oil. Place the chicken breasts in the dish, ensuring they are not overcrowded. Season very lightly with salt, keeping in mind that the Caesar dressing and parmesan already contain significant sodium.
Applying the Heavy Caesar Layer
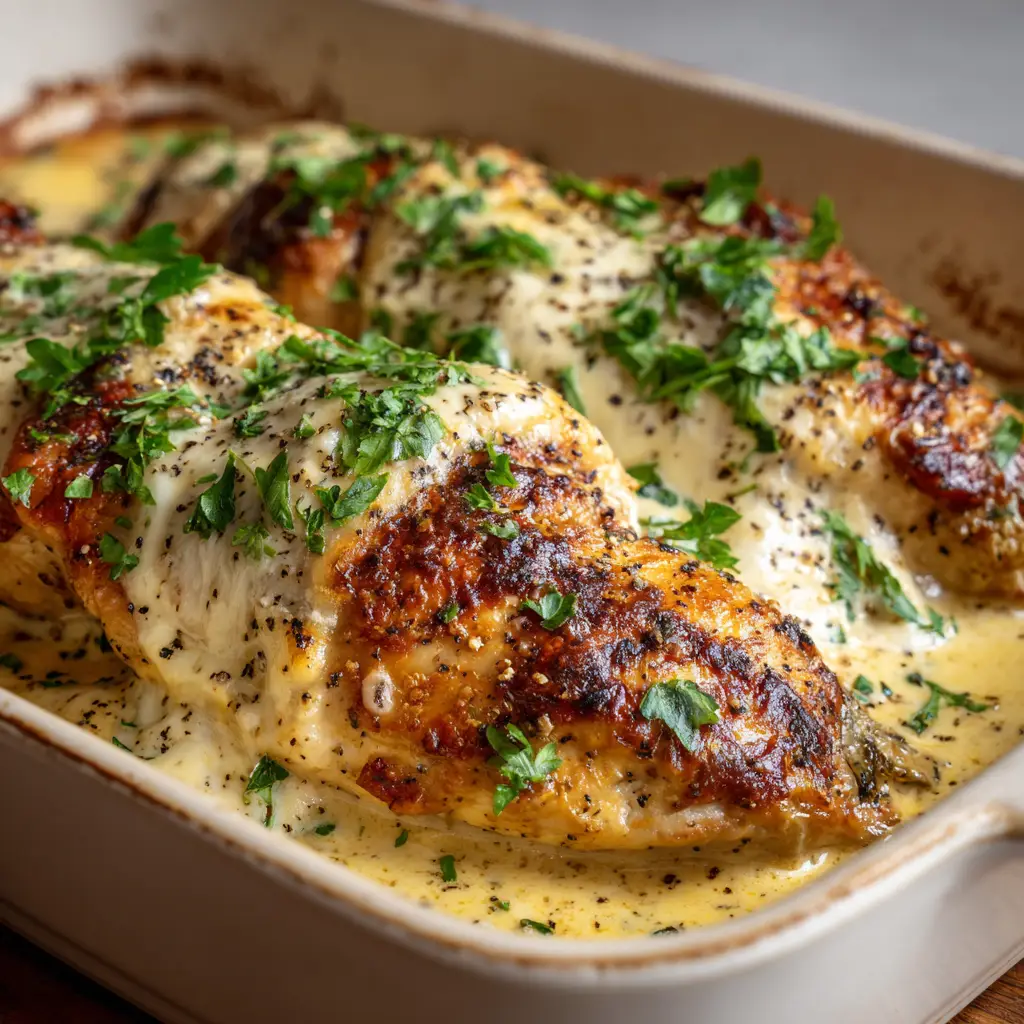
Pour 1 cup (240ml) of the thick, opaque pale-yellow Caesar sauce into a small bowl. Using a spoon or a silicone spatula, smother each chicken breast generously. You want a heavy, visible layer that coats the top and sides, acting as a moist heat barrier for the poultry during the baking process.
The sauce should look thick and creamy, not translucent. If your dressing is too thin, you can whisk in a tablespoon of mayonnaise to reach the desired “heavy” consistency described in the visual recipe blueprint.
The Cheese Blanket and the Blistering Process
In a separate bowl, toss together your shredded mozzarella and grated parmesan. Sprinkle this mixture heavily over the sauced chicken. The cheese should form a thick, opaque white blanket that completely hides the sauce beneath it.
Place the dish in the center of the oven and bake for 20-25 minutes. During the last 3-4 minutes, switch your oven to the “Broil” setting. Watch closely—this is when the magic happens. You are looking for the cheese to transition from melted white to featuring golden-brown, slightly blistered and charred cooked spots.
The Final Visual Flourish
Once the cheese is perfectly blistered, remove the Caesar Chicken from the oven. Let it rest for 5 minutes; this allows the juices to redistribute and the sauce to set slightly. This resting period is crucial for that “thick” sauce appearance when served.
Just before serving, apply the light dusting of coarse cracked black pepper. Finish with the vibrant, finely minced fresh green parsley. The contrast between the dark pepper, the bright green herbs, and the charred cheese creates the professional handheld smartphone photo look we are targeting.
Expert Tips for Culinary Success
- Temperature Control: Always use room temperature chicken if possible. This helps the thickest part of the breast cook at the same rate as the exterior, preventing the sauce from breaking before the chicken is done.
- Sauce Selection: If you want to elevate the dish further, try using a dressing similar to the one in my creamy roasted garlic lemon pasta sauce for an extra citrus kick.
- The Broiler Watch: Cheese can go from perfectly blistered to burnt in thirty seconds. Stay by the oven during the final broiling phase to ensure those golden-brown spots don’t turn black.
- Avoid the Water: If your chicken releases too much liquid, carefully spoon it out of the corner of the dish before broiling. This keeps the Caesar sauce “heavy” and “creamy” rather than watery.
Storage, Reheating, and Freezing Advice
Leftover Caesar Chicken can be stored in an airtight container in the refrigerator for up to 3 days. To reheat, place the chicken back in a baking dish, cover with foil, and warm at 350°F (175°C) until the center is hot. This prevents the sauce from separating, which often happens in the microwave.
While you can freeze this dish, the dairy in the Caesar sauce and the mozzarella may change texture slightly upon thawing. If you must freeze it, do so for no more than 1 month and thaw completely in the fridge before following the oven reheating instructions.
Perfect Pairings: What to Serve with Caesar Chicken
This dish is incredibly rich, so it pairs beautifully with light, acidic sides. A simple arugula salad with a lemon vinaigrette or steamed asparagus provides a crisp contrast to the heavy cream and melted cheese. For a more indulgent meal, serve it alongside some crispy pizza chips or a slice of cottage cheese cloud bread to soak up the extra sauce.
If you’re looking for a surf-and-turf variation for your next gathering, consider serving this alongside my steak and shrimp quesadillas as a decadent appetizer. Alternatively, a side of roasted potatoes seasoned with the same parsley and cracked pepper will round out the plate perfectly.
Your Pressing Caesar Chicken Questions Answered
Yes, you can use boneless skinless chicken thighs. However, since thighs are thinner, you may need to adjust the cooking time to 15-20 minutes to avoid overcooking the meat.
The secret is a quick 2-3 minute broil at the very end of the baking process. Watch the chicken closely through the oven window to catch the cheese just as it begins to char and bubble.
Yes! This recipe is naturally low-carb and high-protein. Most creamy Caesar dressings have very little sugar, making this an excellent choice for a ketogenic diet.
A thick, cream-based refrigerated Caesar dressing is best. Avoid thin, oil-based vinaigrettes as they will run off the chicken and won’t create the opaque, heavy sauce layer seen in the photos.
This usually happens if the chicken wasn’t patted dry before adding the sauce, or if you used frozen chicken that wasn’t fully thawed. Surface moisture mixes with the sauce and thins it out.
The Ultimate Baked Caesar Chicken Recipe Card
Caesar Chicken: The Ultimate Creamy Baked Chicken Breast Recipe
Ingredients
Equipment
Instructions
- Preheat your oven to 400°F (200°C) and grease a white ceramic baking dish with olive oil.
- Pat the chicken breasts dry with paper towels and place them in the prepared dish.
- Spoon the thick pale-yellow Caesar dressing over each breast until heavily coated.
- Combine mozzarella and parmesan, then sprinkle generously over the sauce layer.
- Bake for 20-25 minutes until the chicken reaches 165°F (74°C).
- Switch to broil for 2-3 minutes until the cheese shows golden-brown blistered spots.
- Garnish with coarse cracked black pepper and minced parsley before serving.
Notes
Ensure you pat the chicken dry to prevent the sauce from becoming watery during baking.
Join the Community and Share Your Creations!
We hope this Caesar Chicken becomes a staple in your home! The combination of thick chicken, creamy sauce, and blistered cheese is truly a game-changer for weeknight dinners. If you enjoyed this recipe, please leave a comment below and let us know how your cheese blisters turned out!
Don’t forget to follow us on Pinterest for more visually stunning recipe inspiration. If you make this, snap a photo and tag us—we love seeing your “handheld smartphone photos” of our recipes in the wild! For more creamy chicken inspiration, check out our creamy herb chicken or the bold flavors of our salsa verde chicken casserole.