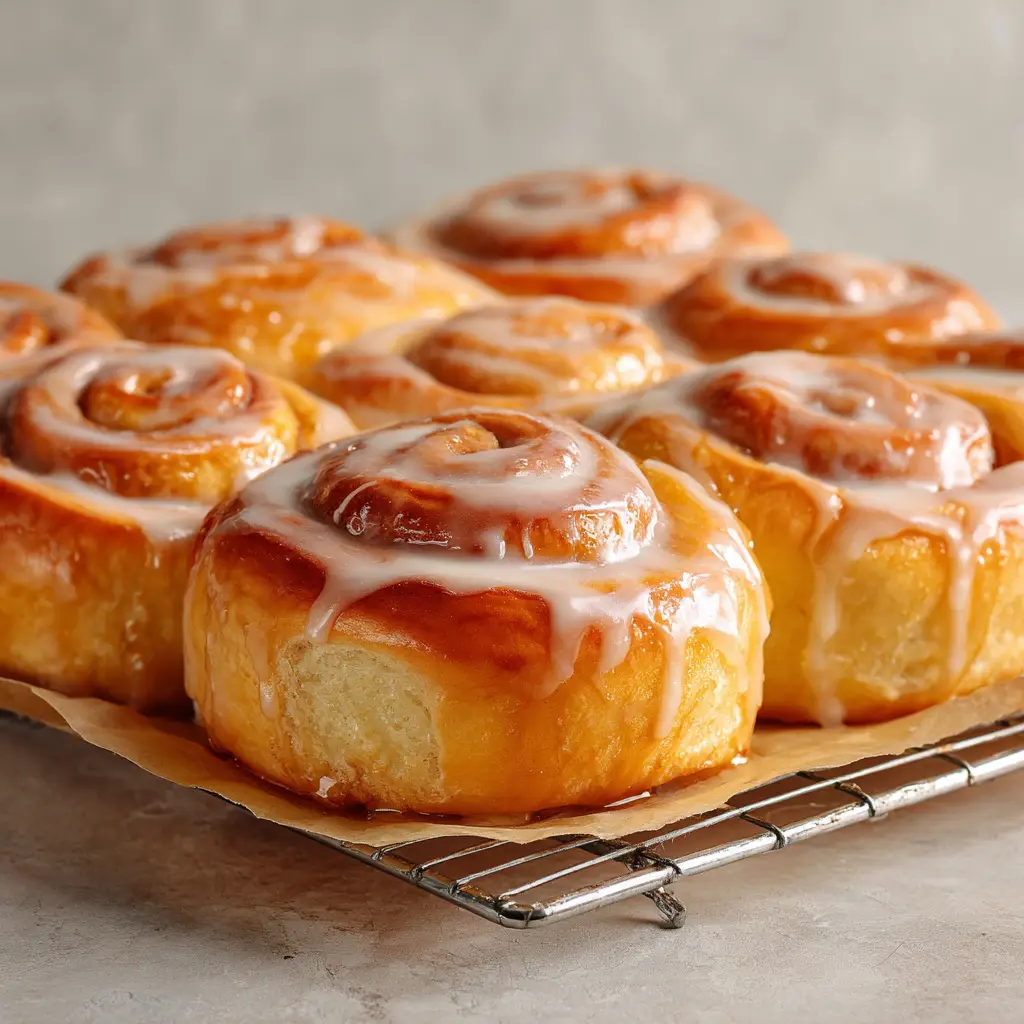
There is nothing quite like the nostalgic aroma of freshly baked yeast dough wafting through the kitchen. These Homemade Honey Buns are a far cry from the plastic-wrapped versions of our childhood, offering a level of pillowy softness and rich, honey-infused flavor that simply cannot be manufactured. Each bun features a classic spiral shape, meticulously rolled to create layers of tender dough that pull apart with ease.
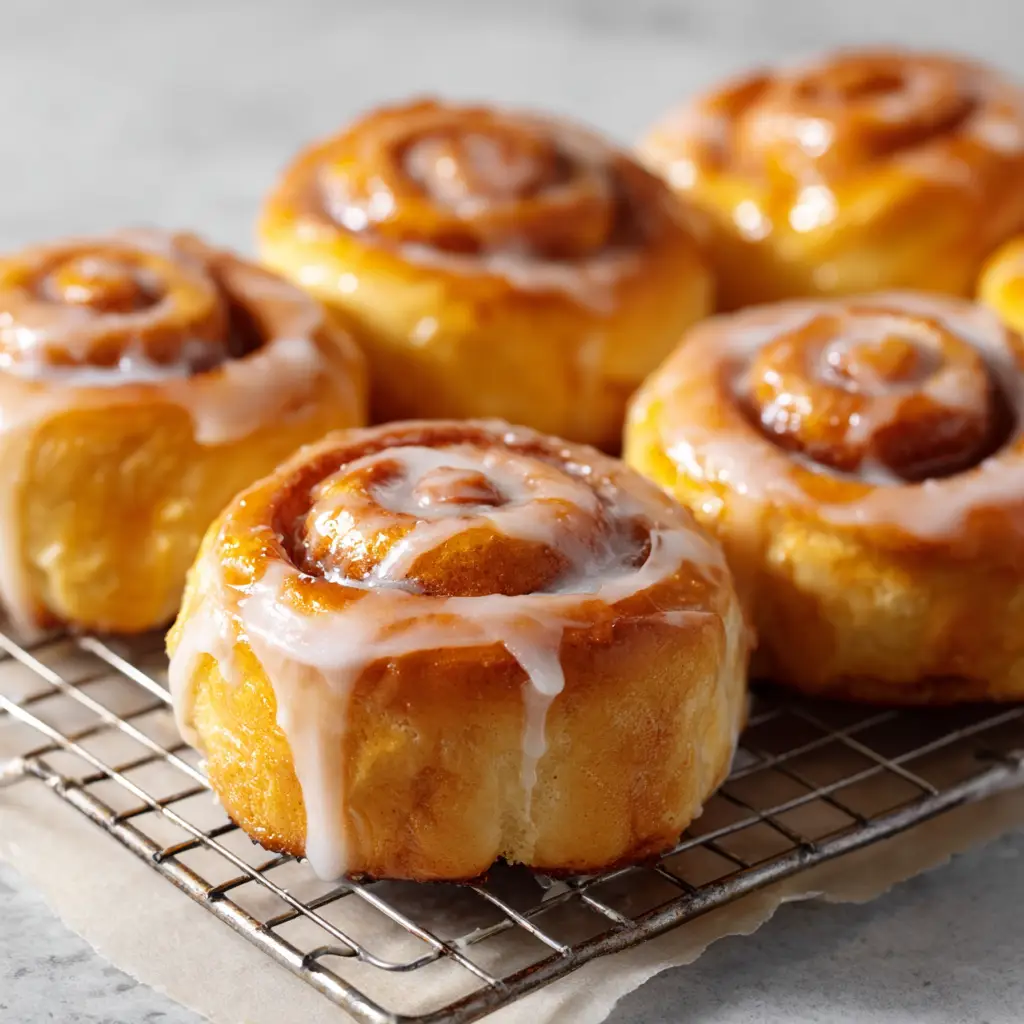
The visual appeal of these rolls is undeniable, characterized by their perfectly baked, slightly caramelized edges and a deep golden-brown finish. The crowning glory, however, is the generous coating of thick, glossy, sticky translucent white honey icing. As the icing pools slightly on the parchment paper below, it creates a sweet, irresistible base that makes every bite a sensory experience.
Whether you are serving these for a special Sunday brunch or as a decadent afternoon treat, the soft natural daylight hitting the translucent glaze makes them look as good as they taste. This recipe focuses on professional techniques to ensure your dough rises perfectly and your glaze achieves that signature professional sheen.
Why These Golden-Brown Honey Buns Stand Out
- The Perfect Pull-Apart Texture: Using a high-protein flour and a precise kneading technique results in an incredibly soft, fluffy crumb that yields to the touch.
- Authentic Honey Glaze: Unlike standard sugar glazes, our version uses real honey to create a sticky, translucent finish that drips beautifully down the spiral edges.
- Caramelized Foundation: We bake these just long enough to develop golden-brown edges, providing a subtle hint of toasted sugar that balances the sweet icing.
- Handcrafted Spiral Detail: The manual rolling process ensures each bun has a distinct spiral, maximizing the surface area for that delicious honey coating.
Essential Components for the Fluffiest Sweet Dough
Whole Milk (240ml / 1 cup): The fat content in whole milk is non-negotiable for a rich dough. It provides the necessary hydration while tenderizing the gluten for a soft bite.
Active Dry Yeast (7g / 1 packet): This is the engine of our recipe. When properly bloomed, it creates the airy pockets that give these rolls their signature height.
Unsalted Butter (75g / 5 tbsp): Melted and slightly cooled, butter adds a luxurious mouthfeel. It coats the flour proteins, ensuring the buns stay tender even after cooling.
Wildflower Honey (60ml / 1/4 cup): We use honey directly in the dough to mirror the flavor of the glaze. It also helps with the browning process, giving us those caramelized edges.
Large Egg (50g / 1 unit): An egg provides structure and richness. The lecithin in the yolk acts as a natural emulsifier, binding the fats and liquids into a smooth dough.
Bread Flour (500g / 4 cups): While all-purpose works, bread flour contains more protein. This creates the strength needed to hold the spiral shape during the second rise.
Fine Sea Salt (5g / 1 tsp): Salt is essential for flavor balance. It regulates the yeast activity and strengthens the gluten network.
Secrets to the Glossy Translucent Honey Icing
Powdered Sugar (240g / 2 cups): This provides the white base of our icing. Sifting it is crucial to ensure a smooth, lump-free finish that looks professional.
Additional Honey (30ml / 2 tbsp): The honey in the glaze provides the “sticky” factor. It keeps the icing from drying out too quickly and gives it that translucent glow.
Heavy Cream (45ml / 3 tbsp): Cream adds opacity and richness. It ensures the icing is thick enough to pool at the bottom without being watery.
Vanilla Bean Paste (5ml / 1 tsp): The tiny flecks of vanilla bean add visual depth. It enhances the floral notes of the honey perfectly.
Precision Equipment for Bakery-Quality Results
To achieve the look of a professional pastry chef, you will need a few key tools. A stand mixer fitted with a dough hook is highly recommended for achieving the correct gluten development without over-tiring your arms. A heavy-duty rolling pin allows for even thickness when shaping the dough into a rectangle.
For the baking phase, use a large rimmed baking sheet lined with high-quality parchment paper. This prevents sticking and makes cleanup of the sticky honey drips much easier. Finally, a metal cooling rack is vital. Placing the hot buns on a rack allows air to circulate, preventing the bottoms from becoming soggy while you apply the glaze.
Step-by-Step Guide to Crafting Homemade Honey Buns
1. Blooming the Yeast and Mixing the Dough
In the bowl of your stand mixer, combine the warm milk (110°F/43°C) with a tablespoon of honey. Sprinkle the yeast over the top and let it sit for about 10 minutes until it becomes foamy. This “bloom” is your visual cue that the yeast is alive and ready to work.
Add the remaining honey, melted butter, and the egg to the yeast mixture. Whisk gently to combine. Gradually add the bread flour and salt. Use the dough hook on low speed until a shaggy dough forms and starts to pull away from the sides of the bowl.
2. The Kneading and First Proof
Increase the mixer speed to medium and knead the dough for 6-8 minutes. You are looking for a smooth, elastic texture that is slightly tacky but doesn’t stick to your fingers. This development is what creates the “pull-apart tender” result shown in our visuals.
Place the dough in a lightly oiled bowl and cover with a damp cloth. Let it rise in a warm, draft-free spot for about 60-90 minutes, or until it has doubled in size. This slow fermentation is key for flavor development.
3. Shaping the Classic Honey Bun Spiral
Gently punch down the dough to release excess gas. On a lightly floured surface, roll the dough into a large rectangle, roughly 12×18 inches (30x45cm). Brush the surface with a thin layer of melted butter.
Starting from the long edge, roll the dough into a tight log. Use a sharp knife or unscented dental floss to cut the log into 12 even pieces. Place each spiral onto the prepared baking sheet, leaving ample space for them to expand during the second rise.
4. The Second Rise and Achieving the Golden-Brown Bake
Cover the spirals loosely and let them rise again for 30-45 minutes. They should look puffy and soft. Preheat your oven to 350°F (175°C). Bake for 20-22 minutes until the edges are caramelized and the tops are a beautiful golden brown.
Check the internal temperature with a thermometer; it should read 190°F (88°C) for a perfectly cooked interior. Immediately transfer the buns from the baking sheet to a metal cooling rack set over clean parchment paper.
5. Glazing for Maximum Drip and Shine
While the buns are still warm, whisk together the powdered sugar, honey, heavy cream, and vanilla. The icing should be thick but pourable. Generously spoon the icing over each bun, allowing it to coat the top and drip down the spiral sides.
The heat from the buns will melt the icing slightly, creating that signature translucent white look. Allow them to sit for 5 minutes so the icing can set into a sticky, glossy coating before serving.
Expert Tips for Perfect Sweet Rolls Every Time
- Temperature Control: Ensure your milk isn’t too hot (above 120°F/49°C) or it will kill the yeast. A simple kitchen thermometer is your best friend here.
- Don’t Over-Flour: It is tempting to add more flour if the dough is sticky, but too much flour leads to a dry, tough bun. Trust the kneading process!
- The Warm Glaze Secret: Always glaze the buns while they are still warm. This allows the first layer of icing to soak in slightly, while the second layer provides the glossy “drip” visual.
- Proofing Environment: If your house is cold, turn your oven on for 1 minute, then turn it off. Place your dough inside the slightly warmed oven for an ideal proofing chamber.
How to Store and Refresh Your Honey Buns
These Homemade Honey Buns are best enjoyed the day they are made, especially while the glaze is fresh and sticky. However, you can store leftovers in an airtight container at room temperature for up to 2 days. To maintain that soft texture, avoid refrigerating them as it can dry out the starch molecules.
To reheat, place a bun in the microwave for 10-15 seconds. This will soften the dough and make the honey glaze glossy and translucent again. For longer storage, you can freeze the unglazed baked buns for up to 3 months. Simply thaw at room temperature and apply fresh glaze before serving.
What to Serve with Your Sweet Breakfast Pastries
While these buns are a meal in themselves, they pair beautifully with a variety of other dishes. For a full brunch spread, consider serving them alongside something savory to balance the honey sweetness. A side of crispy bacon or a protein-heavy dish like our Steak and Shrimp Quesadillas works surprisingly well for a hearty morning meal.
If you’re looking for more comfort food to round out your weekend, our French Onion Soup offers a sophisticated savory contrast. For those who love a bit of spice with their sweet, try pairing a bun with some Taco Ranch Bites during a game-day brunch. If you have leftover honey from the glaze, use it to whip up some Texas Roadhouse Cinnamon Honey Butter for toasted bread the next morning.
Frequently Asked Questions
This specific recipe is for baked honey buns, which creates a lighter, fluffier texture that is easier to manage at home while still achieving that iconic sticky-sweet result.
Yes, you can, but bread flour is recommended for these Homemade Honey Buns because its higher protein content helps the spiral shape hold its structure during the rise and bake.
The honey in the dough recipe naturally aids in browning. To get those specific edges, ensure your oven is fully preheated and don’t be afraid to let them bake until they reach a deep golden brown.
The secret is applying the glaze while the buns are still warm but not hot. This allows the first layer to sink in slightly while the rest sets on top into a glossy, translucent finish.
The most common reason is that the liquid used to bloom the yeast was either too hot (killing the yeast) or too cold (not activating it). Ensure your milk is exactly 110°F (43°C).
The Ultimate Recipe for Homemade Honey Buns
Homemade Honey Buns: The Ultimate Fluffy Spiral Sweet Roll Recipe
Ingredients
Equipment
Instructions
- Combine warm milk and 1 tbsp honey in a mixer bowl. Sprinkle yeast over and let sit for 10 mins until foamy.
- Add remaining dough ingredients. Knead with a dough hook for 6-8 mins until smooth and elastic.
- Cover and let rise in a warm spot for 60-90 mins until doubled in size.
- Roll dough into a 12x18 inch rectangle. Roll into a log and cut into 12 spirals.
- Place on parchment-lined sheet and let rise for 45 mins until puffy.
- Bake at 350°F (175°C) for 20-22 mins until golden-brown with caramelized edges.
- Whisk glaze ingredients. Pour over warm buns on a cooling rack, allowing it to drip down the sides.
Notes
Bread flour is preferred over AP flour for a better spiral structure.

Experience the Joy of Freshly Baked Honey Buns
There is nothing quite as satisfying as mastering a yeast dough recipe. These Homemade Honey Buns offer a professional-grade result with a tender, pull-apart crumb and a glaze that perfectly mimics the best bakeries. The combination of the golden-brown spiral and the dripping honey icing makes these a showstopper on any table.
We invite you to try this recipe and see the difference that real ingredients and careful technique can make. If you enjoyed this recipe, please leave a comment below and let us know how your spirals turned out! Don’t forget to follow us on Pinterest for more culinary inspiration and share your beautiful bakes with our community.