Get ready to meet your new favorite weeknight dinner. These Cheesy Garlic Chicken Wraps are the perfect fusion of savory chicken, gooey melted cheese, and an irresistible garlic butter glaze, all bundled into a warm, crispy tortilla. This recipe is incredibly easy to follow and delivers a restaurant-quality meal in under 30 minutes. It’s a guaranteed crowd-pleaser that will have everyone asking for seconds. Forget boring sandwiches; this is the ultimate upgrade for a quick lunch or a satisfying dinner.
We’ve designed this recipe to be not only delicious but also incredibly versatile. Whether you’re using leftover rotisserie chicken or cooking from scratch, the result is always a perfectly balanced, flavor-packed wrap. The golden-brown, crispy exterior gives way to a warm, cheesy, and succulent filling that is simply divine.
Why You’ll Fall in Love With This Recipe
- Incredibly Fast: From prep to plate in less than 30 minutes, it’s the perfect solution for busy weeknights.
- Packed with Flavor: The combination of seasoned chicken, two types of cheese, and a rich garlic butter sauce creates an unforgettable taste.
- Perfectly Crispy: We’ll show you how to pan-sear these wraps to achieve a satisfyingly crunchy and golden-brown finish.
- Customizable: Easily adapt the recipe with different fillings, cheeses, or even a spicy kick to make it your own.
Ingredients You’ll Need
The magic of these Cheesy Garlic Chicken Wraps comes from simple, high-quality ingredients. Here’s what you’ll need to gather.

For the Chicken Filling
- Chicken: Cooked and shredded. Rotisserie chicken is a fantastic time-saver, but any cooked chicken breast or thigh meat will work beautifully.
- Cream Cheese: Use full-fat, softened cream cheese for the creamiest, richest texture.
- Cheddar & Mozzarella Cheese: This duo provides the perfect melt and a classic cheesy flavor. Freshly grated cheese melts better than pre-shredded varieties.
- Seasoning: A simple mix of garlic powder, onion powder, smoked paprika, salt, and black pepper gives the chicken a savory depth.
- Green Onions: For a mild, fresh bite that cuts through the richness.
For the Garlic Butter & Assembly
- Large Tortillas: Flour tortillas that are 10-12 inches work best for holding all the delicious filling.
- Butter: Salted butter forms the base of our incredible garlic glaze.
- Garlic: Freshly minced garlic is a must for the best flavor.
- Parsley: Freshly chopped parsley adds a pop of color and freshness to the butter sauce.
Step-by-Step Instructions
Follow these simple steps to create the most amazing Cheesy Garlic Chicken Wraps right in your own kitchen.
1. Prepare the Cheesy Chicken Filling
In a medium bowl, combine the shredded chicken, softened cream cheese, shredded cheddar, shredded mozzarella, garlic powder, onion powder, paprika, salt, pepper, and sliced green onions. Mix everything together until it’s evenly combined and creamy.

2. Assemble the Wraps
Lay a large flour tortilla on a flat surface. Spoon approximately one-fourth of the chicken mixture onto the center of the tortilla. Fold in the sides of the tortilla first, then tightly roll it up from the bottom to create a secure burrito-style wrap.
3. Pan-Sear to Golden Perfection
Melt one tablespoon of butter in a large skillet or pan over medium heat. Place two wraps seam-side down in the pan. Cook for 2-3 minutes per side, until the wraps are golden brown and crispy. Remove from the pan and set aside. Repeat with the remaining butter and wraps.
4. Make the Garlic Butter Glaze
While the last two wraps are searing, melt the remaining butter in a small microwave-safe bowl. Stir in the minced garlic and fresh parsley. Brush this fragrant garlic butter generously over the top of all the warm, crispy wraps.
5. Serve and Enjoy
Slice the wraps in half and serve them immediately while they’re warm and the cheese is gooey. They are fantastic on their own or with your favorite dipping sauce like ranch or a spicy aioli.
Tips for the Best Chicken Wraps
- Don’t Overstuff: Be generous with the filling, but avoid overstuffing the tortillas, as this can cause them to tear when you roll or cook them.
- Shred Your Own Cheese: For the best melt and flavor, buy blocks of cheddar and mozzarella and grate them yourself. Pre-shredded cheeses often contain anti-caking agents that prevent smooth melting.
- Keep an Eye on the Heat: Medium heat is perfect for crisping the tortilla without burning it. Adjust as needed to get that perfect golden-brown color.
Variations and Substitutions
One of the best things about these Cheesy Garlic Chicken Wraps is how easy they are to customize. Try adding cooked bacon bits or a drizzle of ranch dressing to the filling for a chicken bacon ranch version. For a low-carb alternative, you could serve the filling with a side of keto-friendly bread instead of in a tortilla. If you enjoy a bit of spice, add a pinch of red pepper flakes or some diced jalapeños to the chicken mixture.
What to Serve with Your Wraps
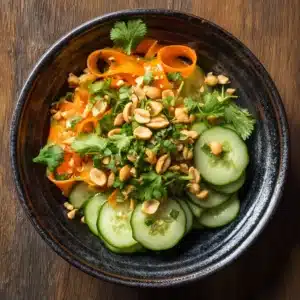
These wraps are a meal in themselves, but they also pair wonderfully with a variety of sides. A simple green salad, some crispy french fries, or a light soup like our Thai Coconut Curry Dumpling Soup would make for a complete and satisfying meal. For a heartier option, consider serving them alongside a comforting dish like this Hamburger Supreme Casserole.
Storage and Reheating Instructions
You can store leftover wraps in an airtight container in the refrigerator for up to 3 days. To reheat, the best method is to use an air fryer or a skillet over medium heat for a few minutes until heated through and crispy. Microwaving will make the tortilla soft, but it works in a pinch.
Frequently Asked Questions
While they are best enjoyed fresh, you can freeze them. For best results, wrap each cooked and cooled wrap individually in plastic wrap and then place them in a freezer-safe bag. They can be stored for up to 2 months. Reheat in an air fryer or oven to restore their crispiness.
Yes, you can prepare the components in advance. The chicken filling can be mixed and stored in an airtight container in the refrigerator for up to 2 days. You can also assemble the wraps and refrigerate them before cooking, which makes for an even faster meal when you’re ready to eat.
The secret to a crispy wrap is a hot pan and butter. Cook the wraps seam-side down first over medium heat. This helps seal the wrap. Don’t move them around too much; let them sit for 2-3 minutes per side to develop a golden-brown, crunchy crust. The final garlic butter glaze should be brushed on after they are cooked.
These wraps are delicious on their own, but a good dipping sauce can elevate them even further. Classic choices like ranch dressing or blue cheese dressing work well. For a bit of a kick, try a spicy aioli, chipotle mayo, or your favorite salsa.
The great thing about this recipe is its versatility. You can use any cooked chicken you have on hand. Rotisserie chicken is a fantastic shortcut for a quick meal, but leftover baked or pan-fried chicken breast or thighs work perfectly as well. Just be sure to shred it for the best texture.
The Perfect Cheesy Garlic Chicken Wraps Recipe
This recipe is more than just a quick meal; it’s a culinary experience that brings comfort and flavor to your table with minimal effort. We know you’ll love these Cheesy Garlic Chicken Wraps as much as we do. If you make them, please leave a comment below and share your creation on Pinterest!

Recipe Card
Cheesy Garlic Chicken Wraps: The Ultimate 30-Minute Meal
Ingredients
Equipment
Instructions
- In a medium bowl, combine the shredded chicken, softened cream cheese, shredded cheddar, shredded mozzarella, garlic powder, onion powder, paprika, salt, pepper, and sliced green onions. Mix until evenly combined.
- Spoon one-fourth of the chicken mixture onto the center of each tortilla. Fold in the sides, then tightly roll up from the bottom to create a burrito-style wrap.
- Melt 1 tbsp of butter in a large skillet over medium heat. Place two wraps seam-side down and cook for 2-3 minutes per side, until golden brown and crispy. Remove and repeat with another 1 tbsp of butter and the remaining two wraps.
- In a small bowl, melt the remaining 2 tbsp of butter. Stir in the minced garlic and fresh parsley.
- Brush the garlic butter generously over the warm wraps. Slice in half and serve immediately.
Notes
Ensure your skillet is preheated to medium to get a perfectly crispy, golden-brown exterior without burning the tortilla.
Feel free to add cooked, crumbled bacon to the filling for extra flavor.