Welcome to the ultimate guide to creating the most elegant, show-stopping dessert imaginable: the Mille Crepe Cake. This stunning crepe cake recipe features over twenty delicate, paper-thin crepes layered with a luscious, velvety vanilla pastry cream. While it looks like it came straight from a high-end French patisserie, I’m going to walk you through every step to prove that you can create this masterpiece right in your own kitchen. It’s the perfect no-bake cake for special occasions, birthdays, or anytime you want to truly wow your guests.
What is a Crepe Cake?
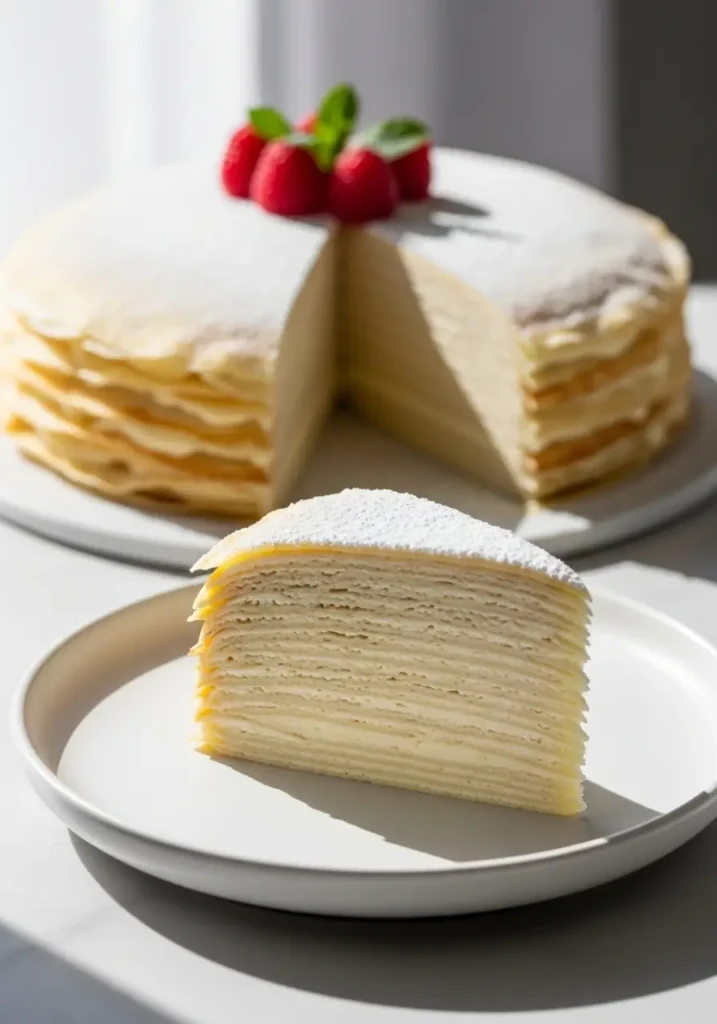
A Mille Crepe Cake, or “gâteau de crêpes” in French, literally translates to “cake of a thousand crepes.” While it doesn’t have quite that many, the name beautifully captures the essence of this dessert. It’s constructed by stacking numerous thin crepes, each separated by a layer of sweet filling. The result is a dessert with an incredible texture—soft, creamy, and light—that melts in your mouth with every bite. The beauty is in its simplicity and the elegance of its many, many layers.
Why This is the Best Crepe Cake Recipe
- Foolproof Crepe Batter: Our batter rests for the most tender, delicate crepes that are easy to work with. For a deep dive into the basics, check out our easy crepe recipe.
- Luscious & Stable Filling: We use a classic vanilla bean pastry cream (crème pâtissière) that is rich in flavor but perfectly thick, ensuring your cake layers won’t slide.
- Detailed Assembly Guide: I’ll share all the pro tips for stacking a perfectly straight, beautiful cake without any stress.
- Make-Ahead Friendly: You can prepare the components in advance, making assembly a breeze on the day you plan to serve it.
Ingredients You’ll Need
This recipe uses simple, staple ingredients to create something truly extraordinary. For best results, use high-quality ingredients, especially for the vanilla in the pastry cream.
For the Crepes:
- All-purpose flour
- Granulated sugar
- Salt
- Large eggs
- Whole milk
- Unsalted butter, melted
- Vanilla extract
For the Vanilla Pastry Cream Filling:
- Whole milk
- Vanilla bean or pure vanilla extract
- Granulated sugar
- Cornstarch
- Salt
- Large egg yolks
- Unsalted butter
- Heavy whipping cream
 | Step-by-Step Guide 1")
Essential Equipment
You don’t need much fancy equipment, but a few key tools will make the process much smoother:
- 8-inch Non-stick Skillet: This is the key to cooking perfect, uniform crepes that don’t stick.
- Whisks and Spatulas: For mixing the batter and the pastry cream.
- Offset Spatula: This is your secret weapon for spreading the filling in thin, even layers during assembly.
- Blender (Optional): For an ultra-smooth, lump-free batter in seconds. A classic blender crepe recipe (coming soon) is always a time-saver!
How to Make a Crepe Cake: Step-by-Step
We’ll break this down into manageable steps. The key is patience and allowing each component to cool or chill properly.
Step 1: Make and Rest the Crepe Batter
In a large bowl, whisk together the flour, sugar, and salt. In a separate bowl, whisk the eggs, milk, melted butter, and vanilla. Gradually pour the wet ingredients into the dry ingredients, whisking continuously until just combined. Don’t overmix! Some small lumps are okay. Cover the bowl with plastic wrap and let the batter rest in the refrigerator for at least 1 hour, or overnight. This step is crucial—it allows the gluten to relax, resulting in much more tender crepes.
Step 2: Cook the Crepes
Heat your 8-inch non-stick skillet over medium-low heat. Lightly grease with butter. Pour about 3-4 tablespoons of batter into the center of the pan and immediately swirl the pan to spread the batter into a thin, even circle. Cook for 60-90 seconds, until the edges are lightly golden and the surface looks dry. Gently flip with a spatula and cook for another 30 seconds. Slide the crepe onto a plate. Repeat with the remaining batter, stacking the finished crepes on top of each other. This stack will steam them slightly, keeping them soft and pliable. You should have about 20-25 crepes. Let them cool completely.
Step 3: Prepare the Vanilla Pastry Cream
In a medium saucepan, heat the milk and vanilla until it just begins to simmer. While it heats, whisk the sugar, cornstarch, salt, and egg yolks in a heatproof bowl until pale and smooth. Once the milk is hot, slowly pour about half of it into the egg yolk mixture while whisking constantly (this is called tempering). Pour the tempered egg mixture back into the saucepan with the rest of the milk. Cook over medium heat, whisking constantly, until the cream thickens and comes to a boil. Let it bubble for 1 minute, then remove from heat. Whisk in the butter until fully incorporated. Pour the pastry cream through a fine-mesh sieve into a clean bowl to remove any lumps. Cover with plastic wrap, pressing it directly onto the surface to prevent a skin from forming. Refrigerate for at least 4 hours, or until completely chilled and firm.
Once chilled, whip the heavy cream to stiff peaks. Gently fold the whipped cream into the cold pastry cream until smooth. This lightens the filling, making it extra luscious.
Step 4: Assemble Your Masterpiece
Now for the fun part! Place your first crepe on a cake stand or serving plate. Scoop about 1/3 cup of the lightened pastry cream onto the center. Using an offset spatula, spread the cream into a thin, even layer, leaving about a 1/4-inch border around the edge. Place another crepe on top and gently press down. Repeat this process until you run out of crepes, ending with a plain crepe on top. Don’t press too hard, and try to keep your stack as level as possible.
 | Step-by-Step Guide 2")
Step 5: Chill and Set
This final step is non-negotiable! Tightly cover the assembled crepe cake with plastic wrap and refrigerate for at least 6 hours, or preferably overnight. This gives the filling time to set completely, allowing the flavors to meld and ensuring you can get clean, beautiful slices.
Tips for a Perfect Mille Crepe Cake Recipe
- Rest the Batter: I can’t stress this enough. A rested batter is the secret to tender, non-rubbery crepes.
- Uniform Crepes are Key: Use a measuring scoop for the batter to ensure all your crepes are the same size. This helps in building a level cake.
- Cool Everything Completely: The crepes and the pastry cream must be fully chilled before assembly. Warm components will cause a soupy, sliding mess.
- Don’t Overfill: It’s tempting to add a thick layer of cream, but thin, even layers are what create the signature look and prevent the cake from becoming unstable.
Delicious Filling Variations
While classic vanilla is divine, you can easily customize your crepe cake. For a fun twist, try alternating layers of classic vanilla with one of these delicious options.
| Filling Idea | Notes |
|---|---|
| Chocolate Ganache | A rich and decadent option. Simply layer with a cooled, spreadable chocolate ganache. |
| Lemon Curd Pastry Cream | Fold 1/2 cup of prepared lemon curd into the finished pastry cream for a bright, tangy flavor. |
| Nutella & Hazelnut | Spread a thin layer of Nutella between the crepes and top the cake with toasted chopped hazelnuts. This is a family favorite, just like our classic street-style Nutella crepes (coming soon). |
| Matcha Green Tea | Whisk 2 tablespoons of high-quality matcha powder into the pastry cream base for an earthy, vibrant flavor. See our dedicated matcha crepe cake recipe (coming soon) for specifics. |
How to Decorate Your Crepe Cake
Keep it simple to let the beautiful layers shine. A generous dusting of powdered sugar is classic and elegant. You can also top it with fresh berries, chocolate shavings, or a light drizzle of caramel sauce before serving.
Make-Ahead and Storage Instructions
You can make the crepes and the pastry cream up to 2 days in advance. Store the cooled crepes stacked between sheets of parchment paper in an airtight container in the fridge. Keep the pastry cream in the fridge with plastic wrap pressed onto the surface.
The fully assembled crepe cake will keep in the refrigerator, tightly covered, for up to 3 days. It’s best served chilled, straight from the fridge.
The Best Crepe Cake Recipe
 | Step-by-Step Guide 3")
Crepe Cake Recipe (The Ultimate Guide to Mille Crêpes)
Ingredients
Equipment
Instructions
- In a large bowl, whisk together flour, sugar, and salt. In a separate bowl, whisk eggs, milk, melted butter, and vanilla. Gradually add wet ingredients to dry, whisking until just combined.
- Cover the batter and refrigerate for at least 1 hour or overnight. This is a crucial step for tender crepes.
- In a saucepan, heat 2 cups of milk and vanilla bean/extract until simmering. In a bowl, whisk together sugar, cornstarch, salt, and egg yolks until pale.
- Slowly whisk half the hot milk into the egg yolk mixture. Pour it all back into the saucepan. Cook over medium heat, whisking constantly, until it thickens and boils for 1 minute. Remove from heat, whisk in butter. Strain through a sieve into a bowl.
- Press plastic wrap directly onto the surface of the pastry cream and refrigerate for at least 4 hours, until completely cold and firm.
- Heat an 8-inch non-stick skillet over medium-low heat. Pour ~3 tbsp of batter and swirl to coat the pan. Cook for 60-90 seconds per side, until lightly golden. Stack cooked crepes on a plate to cool completely.
- In a separate bowl, whip the cold heavy cream to stiff peaks. Gently fold the whipped cream into the chilled pastry cream until smooth and combined.
- Place one crepe on your serving platter. Spread about 1/3 cup of filling evenly over the crepe, leaving a small border. Top with another crepe. Repeat until you use all the crepes, ending with a plain crepe on top.
- Cover the assembled cake with plastic wrap and refrigerate for at least 6 hours, or overnight, to allow the cake to set firmly.
- Dust with powdered sugar and decorate with fresh berries, if desired. Slice with a sharp knife and serve chilled.
Notes
Cool Components: Ensure both the crepes and the pastry cream are completely cool before assembling to prevent the filling from melting and the cake from sliding.
Thin Layers: Use an offset spatula for thin, even layers of cream. This is essential for the classic mille crepe look and stability.
Frequently Asked Questions About this Crepe Cake Recipe
There are three keys to prevent sliding: 1) Use a thick, stable filling like our pastry cream. 2) Make sure both the crepes and the filling are completely chilled before assembly. 3) Spread the filling in thin, even layers rather than thick, heavy ones.
A classic crepe cake can have anywhere from 15 to 30 layers. Our recipe yields about 20-25 crepes, which creates a perfect height and a beautiful layered look when sliced.
A classic vanilla pastry cream, like the one in this recipe, is a popular and delicious choice because it’s stable and flavorful. Other great options include whipped chocolate ganache, lemon curd folded into cream, or even a simple Nutella spread.
Runny pastry cream is usually due to not cooking it long enough. It’s crucial to bring the mixture to a full boil and let it bubble for one continuous minute while whisking constantly. This activates the cornstarch and ensures it will set up properly as it cools.
An Unforgettable Dessert Experience
Making this crepe cake recipe is a labor of love, but the result is one of the most rewarding and delicious desserts you’ll ever create. Each slice reveals the stunning layers you so carefully built. It’s a true celebration cake!
If you make this recipe, please leave a comment and rating below! I’d love to hear how it turned out. For more delicious inspiration, follow us on Pinterest.