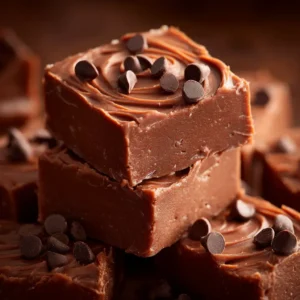
When the holiday season arrives, there is nothing quite as nostalgic and satisfying as a tray of No-Bake Peppermint Balls resting on crinkled parchment paper. These bite-sized treasures capture the essence of a winter wonderland, offering a dense, creamy white center that melts away into a refreshing burst of peppermint.
The visual appeal of these treats is unmatched, featuring a snowy dusting of powdered sugar and a vibrant, crunchy coating of crushed red and white candy canes. Whether you are adding them to a festive dessert board or gifting them in decorative tins, these candies are the quintessential “handheld smartphone photo” worthy treat of the season.
What makes these No-Bake Peppermint Balls truly stand out is their effortless elegance. You don’t need an oven to achieve professional-grade results, just high-quality ingredients and a few minutes of chilling time to set that perfect, velvety texture.

Why You Will Crave These Creamy Peppermint Truffles
- Dense, Creamy Texture: The center is incredibly soft yet holds its round shape, providing a rich mouthfeel that mimics high-end truffles.
- Visual Contrast: The bright red-and-white candy cane fragments pop beautifully against the light dusting of powdered sugar.
- Zero Baking Required: Perfect for busy holiday schedules, these treats come together without ever touching the oven.
- Refreshing Flavor Profile: The cooling sensation of peppermint extract perfectly balances the sweetness of the white candy base.
The Essential Ingredients for Perfect No-Bake Peppermint Balls
Cream Cheese: 8 oz (225g) of full-fat cream cheese provides the foundational “creamy white candy” base described in our visual blueprint. It offers a slight tang that prevents the candy from being overly cloying.
Powdered Sugar: 3.5 cups (420g) of confectioners’ sugar acts as the primary structural agent. It thickens the cream cheese into a rollable dough while providing that signature snowy finish.
White Chocolate Chips: 1 cup (175g) of high-quality white chocolate, melted and cooled slightly, ensures the balls have a “dense white texture” that remains stable at room temperature.
Peppermint Extract: 1 tsp (5ml) of pure peppermint extract provides the soul of the recipe. Ensure you use pure extract rather than imitation for the cleanest, most refreshing flavor.
Crushed Candy Canes: 1/2 cup (125g) of finely crushed red and white candy canes. This provides the “generous coating” that gives these candies their festive crunch and visual pop.
Unsalted Butter: 2 tbsp (30g) of softened butter adds a layer of richness and helps the centers stay smooth and glossy before they are coated.
Pinch of Salt: A tiny 1/8 tsp (0.75g) of fine sea salt is a culinary necessity to enhance the peppermint and sharpen the sweetness of the white chocolate.
Tools for Shaping Professional Holiday Candy
To achieve the “round creamy white candy balls” look, a small cookie scoop (about 1 tbsp capacity) is your best friend. It ensures every ball is uniform in size, which is critical for that professional “pile” aesthetic shown on the parchment paper.
You will also need a food processor or a heavy rolling pin to crush the candy canes into a mix of fine dust and small, jewel-like fragments. Finally, a fine-mesh sieve is essential for achieving that light, even dusting of powdered sugar that finishes the look.

Step-by-Step: How to Master This No-Bake Holiday Treat
Creating the Creamy Foundation
In a large mixing bowl, beat the softened cream cheese and butter until completely smooth and aerated. Slowly fold in the melted white chocolate, ensuring no streaks remain, creating a uniform, dense white base.
Add the peppermint extract and a pinch of salt. Gradually mix in the powdered sugar one cup at a time until a stiff, tacky dough forms that can be easily handled without sticking excessively to your palms.
Chilling and Portioning
Place the dough in the refrigerator for at least 30 minutes. This “culinary science” step allows the fats to solidify, making it much easier to roll the dough into the “bite-sized” spheres seen in our visual prompt.
Once chilled, use your scoop to portion out the dough. Roll each piece between your palms until it is perfectly round and smooth. If the dough warms up too much, return it to the fridge for 10 minutes to maintain its structural integrity.
The Festive Coating Process
Place your finely crushed candy canes in a shallow bowl. Roll each ball in the candy fragments, pressing gently so the red and white pieces adhere to the creamy surface for a “generous coating.”
Arrange the finished balls on a piece of crinkled white parchment paper. For the final touch, use your sieve to apply a light dusting of powdered sugar, mimicking a fresh snowfall over the red and white candy pieces.
Pro Tips for a Flawless Candy Cane Coating
- Sift the Candy: Use a coarse strainer to remove the very fine “dust” from your crushed candy canes if you want more distinct red and white chunks to show up in photos.
- The “Tackiness” Factor: If the candy canes aren’t sticking, let the balls sit at room temperature for 2 minutes to develop a slight “sweat” or tackiness before rolling.
- Temperature Control: If your kitchen is warm, work in small batches, keeping the rest of the dough in the fridge to prevent the No-Bake Peppermint Balls from losing their shape.
- Crinkle the Paper: To achieve that specific “handheld smartphone photo” style, crinkle your parchment paper into a ball then flatten it out before placing the candies; it adds beautiful texture and shadows.
Keeping Your Candy Fresh: Storage and Freezing
Store these No-Bake Peppermint Balls in an airtight container in the refrigerator for up to two weeks. Because of the cream cheese base, they are best kept cold until about 15 minutes before serving.
For long-term storage, these freeze exceptionally well. Place them in a single layer on a tray to freeze solid, then transfer to a freezer bag for up to three months. Thaw them in the fridge overnight to preserve the texture of the candy cane coating.
What to Serve with These Festive Treats
These peppermint treats are the perfect ending to a holiday meal featuring rich, savory dishes. They provide a bright, cooling contrast to something heavy like French Onion Beef Short Rib Soup.
If you are building a holiday dessert spread, pair them with No-Bake Christmas Cheesecake Bites (coming soon) for a themed “no-bake” platter that saves you precious oven space during the holidays.
For a fun party appetizer mix, serve these alongside savory snacks like taco ranch bites. The combination of salty and sweet-minty treats is always a hit at casual gatherings.
Frequently Asked Questions
You can substitute with vegan cream cheese and dairy-free white chocolate, but the texture may be softer. You may need to add extra powdered sugar to maintain the round shape.
Yes, but peppermint oil is much more concentrated. Use only 1/4 tsp of oil for every 1 tsp of extract to avoid an overwhelming menthol flavor.
Use a small cookie scoop for consistent portioning and roll each ball firmly between your palms. Chilling the dough before rolling is the secret to a smooth, round finish.
Wait to roll the balls in the crushed candy canes until they are chilled and you are ready to serve or store. Moisture from the cream cheese can dissolve the sugar over time.
The dough likely needs to be chilled longer. If it remains sticky after 30 minutes, gradually add more powdered sugar, 1/4 cup at a time, until it reaches a workable consistency.
The Ultimate No-Bake Peppermint Balls Recipe
No-Bake Peppermint Balls: The Ultimate Creamy Holiday Candy Recipe
Ingredients
Equipment
Instructions
- Beat softened cream cheese and butter until smooth. Incorporate melted white chocolate and peppermint extract.
- Gradually add 3 cups of powdered sugar until a dense, white, tacky dough forms.
- Chill dough for 30 minutes. Roll into 1-inch balls using a cookie scoop for uniform size.
- Roll each ball in crushed candy canes. Place on parchment paper and dust with remaining powdered sugar using a sieve.
Notes
Use a rolling pin to crush candy canes in a freezer bag for less mess.

Wrap Up Your Holiday Prep with Ease
Mastering the No-Bake Peppermint Balls is a surefire way to bring a touch of professional culinary flair to your home kitchen. With their dense, creamy centers and vibrant candy cane exterior, they are as beautiful to look at as they are delicious to eat.
If you loved this recipe, please leave a comment below and let us know how they turned out! Don’t forget to share your creations and follow us on Pinterest for more festive holiday inspiration.