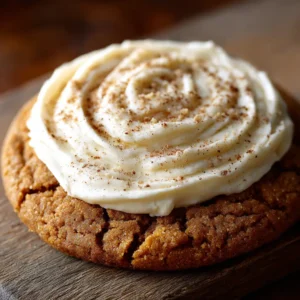
Get ready to discover your new favorite holiday tradition. This no-bake peppermint oreo icebox cake is the perfect make-ahead dessert for any festive gathering. It combines crushed Oreos, a creamy peppermint cheesecake filling, and a rich chocolate topping into one irresistible treat. Forget stressing over the oven; this recipe is all about simple assembly and delicious results.
With its beautiful layers and refreshing peppermint flavor, this cake looks stunning on any dessert table. It’s the kind of easy yet impressive recipe that will have everyone asking for the secret. Let’s dive into how to create this holiday masterpiece.

Why This No-Bake Peppermint Oreo Icebox Cake is a Holiday Must-Have
When the holiday season gets busy, the last thing you need is a complicated dessert. This no-bake peppermint oreo icebox cake is the answer. It requires zero baking time, freeing up your oven for other dishes. The layers of cookie crumbs and peppermint cream set in the refrigerator, creating a wonderfully tender, cake-like texture.
This dessert is also incredibly versatile. You can prepare it a day or two in advance, which makes it a fantastic option for stress-free party planning. The festive flavors of chocolate and peppermint are a classic Christmas combination that both kids and adults will adore.
The Essential Ingredients You’ll Need
You only need a handful of simple ingredients to bring this festive dessert to life. Each component plays a key role in creating the perfect balance of flavors and textures.
- Oreo Cookies: The foundation of our cake. You’ll need a full family-sized package to create the crust and the delicious cookie layers.
- Butter: Melted butter binds the Oreo crumbs together to form a sturdy, flavorful crust.
- Cream Cheese: Use full-fat, block-style cream cheese, softened to room temperature for a smooth, lump-free filling.
- Powdered Sugar: This dissolves easily into the filling, providing sweetness without any graininess.
- Peppermint Extract: The star of the show! A little goes a long way in providing that classic, cool holiday flavor.
- Whipped Topping: A container of frozen whipped topping (like Cool Whip), thawed, makes the filling light, airy, and stable.
- Semi-Sweet Chocolate Chips: For the rich, glossy ganache topping that perfectly complements the peppermint.
- Heavy Cream: This is combined with the chocolate chips to create a smooth, pourable ganache.
- Crushed Candy Canes: For that final festive and crunchy garnish.
Step-by-Step Instructions for the Perfect Peppermint Oreo Icebox Cake
Follow these simple steps to assemble your show-stopping holiday dessert. We’ll break it down into four easy phases: making the crust, mixing the filling, layering the cake, and letting it chill.
Step 1: Prepare the Oreo Crust
First, set aside about 20 Oreo cookies for the layering step later. Place the remaining cookies in a food processor and pulse until they become fine crumbs. If you don’t have a food processor, you can place them in a zip-top bag and crush them with a rolling pin. In a medium bowl, mix the Oreo crumbs with the melted butter until well combined. Press this mixture firmly and evenly into the bottom of a 9×13-inch baking dish. Place the dish in the refrigerator to set while you prepare the filling.
Step 2: Create the Peppermint Cream Cheese Filling
In a large bowl, use an electric mixer to beat the softened cream cheese until it’s completely smooth and creamy. Gradually add the powdered sugar and peppermint extract, mixing until everything is well incorporated. Be sure to scrape down the sides of the bowl. Gently fold in the thawed whipped topping until the mixture is uniform in color and texture. Be careful not to overmix.

Step 3: Layer and Assemble Your Cake
Retrieve your crust from the refrigerator. Spread half of the peppermint cream cheese mixture evenly over the Oreo crust. Next, arrange the 20 whole Oreo cookies you set aside earlier in a single layer on top of the cream filling. Gently press them down. Spread the remaining half of the peppermint filling over the whole Oreos, creating the final creamy layer.
Step 4: Chill to Perfection and Add Topping
Cover the dish with plastic wrap and refrigerate for at least 6 hours, but preferably overnight. This chilling time is crucial for the cake to set properly and for the Oreos to soften. Just before serving, prepare the ganache. Place the chocolate chips in a heatproof bowl. Heat the heavy cream in a small saucepan until it just begins to simmer, then pour it over the chocolate chips. Let it sit for 5 minutes, then whisk until smooth. Pour the ganache over the chilled cake and spread it into an even layer. Immediately sprinkle the crushed candy canes on top. For another great holiday treat, check out this No-Bake Christmas Oreo Lasagna.
Pro Tips for a Flawless Icebox Cake
Want to ensure your cake is absolutely perfect? Here are a few expert tips.
- Use Room Temperature Cream Cheese: This is non-negotiable for a smooth, lump-free filling. Cold cream cheese will result in a clumpy texture.
- Don’t Rush the Chill Time: The magic of an icebox cake happens in the fridge. Letting it set overnight allows the cookies to soften and the flavors to meld together beautifully. If you love easy desserts, you’ll also enjoy these No-Bake Mini Cheesecakes.
- Garnish Just Before Serving: To keep the candy canes crunchy and vibrant, sprinkle them on right after adding the ganache just before you plan to serve the cake.
Storing Your Peppermint Oreo Icebox Cake
This cake is a fantastic make-ahead dessert. You can store it, tightly covered, in the refrigerator for up to 3 days. The Oreos will continue to soften over time, making the texture even more cake-like. You can also freeze the cake for up to one month. To do so, let it set completely, then wrap the dish tightly in both plastic wrap and aluminum foil. Thaw it in the refrigerator overnight before serving.
Frequently Asked Questions
Yes, this cake freezes well. Once it has fully set, wrap the dish securely in plastic wrap and then a layer of aluminum foil. It can be frozen for up to one month. Thaw it overnight in the refrigerator before slicing and serving.
Absolutely! This dessert is perfect for making ahead. You can assemble the entire cake, cover it, and store it in the refrigerator for up to 2 days before adding the ganache and candy cane topping just before serving.
You can, but it will be less stable. If you use real whipped cream, you’ll need to add a stabilizer like powdered gelatin to ensure the filling sets properly and doesn’t become watery. For a foolproof result, whipped topping is recommended.
For the best results, an icebox cake should set in the refrigerator for at least 6 hours. However, letting it chill overnight is highly recommended to allow the cookies to soften perfectly and the flavors to meld together.
Store any leftover cake tightly covered with plastic wrap in the refrigerator. It will stay fresh and delicious for up to 3 days. The Oreo layers will continue to soften over time, enhancing the cake-like texture.
The Easiest Holiday Dessert Awaits!
This no-bake peppermint oreo icebox cake is truly one of the easiest and most delicious desserts you can make for the holidays. It’s a guaranteed crowd-pleaser that will save you time and stress. If you make this recipe, I’d love to see it! Share your creations and tag me on Pinterest.

No-Bake Peppermint Oreo Icebox Cake Recipe
No-Bake Peppermint Oreo Icebox Cake: The Ultimate Christmas Dessert
Ingredients
Equipment
Instructions
- Set aside 20 Oreo cookies for layering. Place the remaining cookies in a food processor and pulse into fine crumbs. Combine crumbs with melted butter in a bowl.
- Press the crumb mixture firmly into the bottom of a 9x13-inch baking dish. Chill in the refrigerator while you prepare the filling.
- In a large bowl, beat the softened cream cheese with an electric mixer until smooth. Add the powdered sugar and peppermint extract, mixing until combined.
- Gently fold the thawed whipped topping into the cream cheese mixture until just combined.
- Spread half of the peppermint filling over the chilled Oreo crust. Arrange the 20 reserved whole Oreo cookies on top in a single layer.
- Spread the remaining filling evenly over the whole Oreos.
- Cover the dish and refrigerate for at least 6 hours, or preferably overnight, to allow the cake to set.
- Before serving, make the ganache. Place chocolate chips in a heatproof bowl. Heat the heavy cream until it simmers, then pour over the chocolate chips. Let stand for 5 minutes, then whisk until smooth.
- Pour the ganache over the chilled cake and spread evenly. Immediately sprinkle with crushed candy canes. Slice and serve.
Notes
Storage: Keep leftovers tightly covered in the refrigerator for up to 3 days.