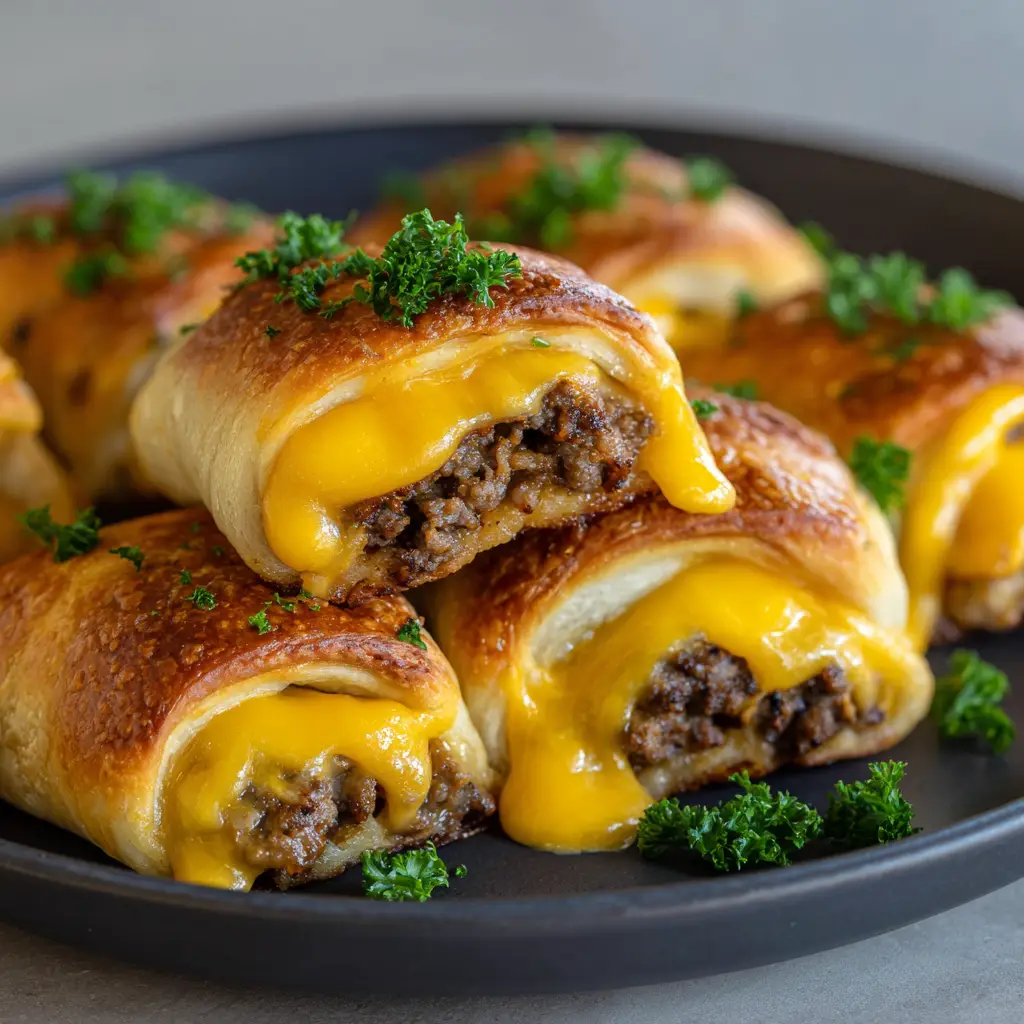
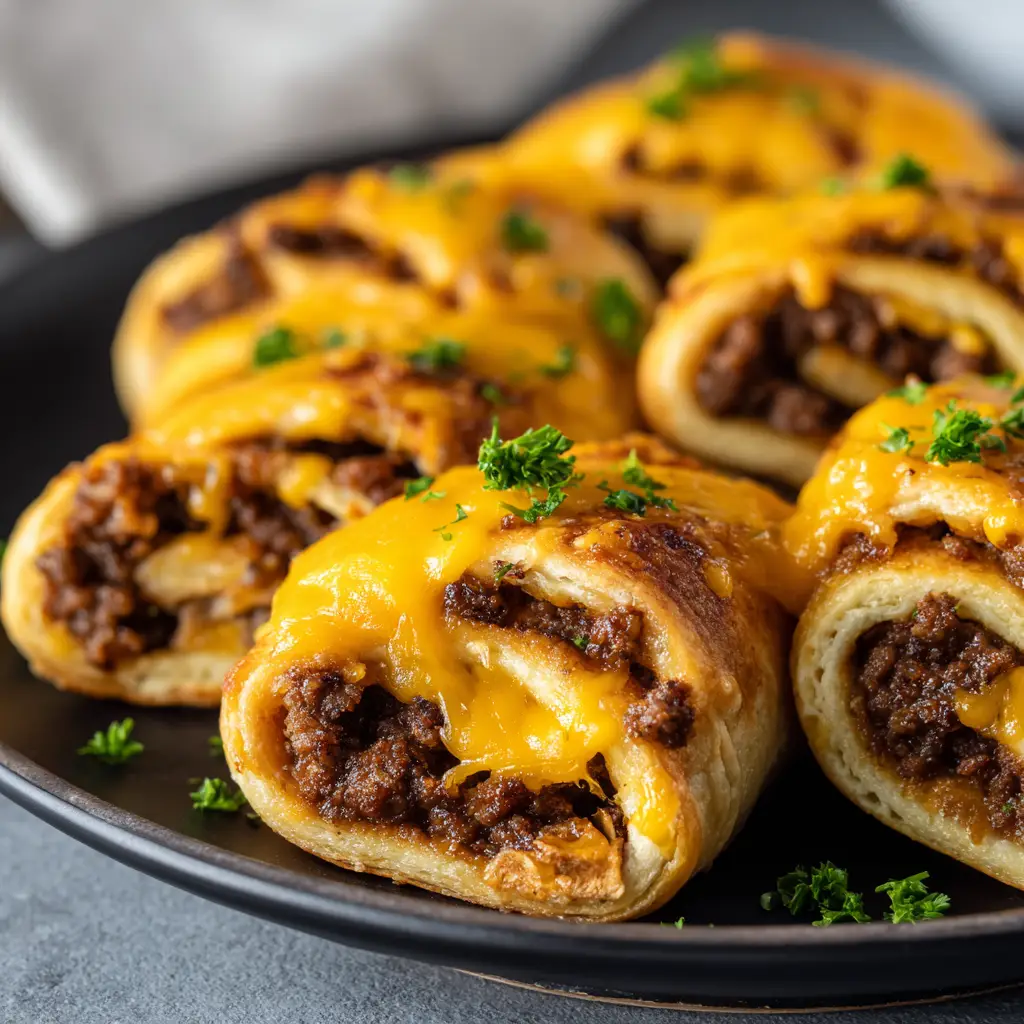
When you imagine the perfect comfort food, your mind likely drifts toward the savory, salt-flecked crust of a perfectly baked pastry and the rich, umami-packed punch of a seasoned burger. These Cheeseburger Rollups represent the pinnacle of that craving, merging the buttery, flaky layers of a crescent roll with the hearty satisfaction of a classic American cheeseburger. The visual appeal is undeniable: soft, golden-brown dough encircling a core of dark brown, crumbly beef, all finished with a dramatic drape of melted, bright yellow cheddar cheese.
Creating this dish isn’t just about assembly; it’s about mastering the textures that make every bite a sensory experience. By following this guide, you will achieve the exact “handheld smartphone photo” quality seen in the best culinary photography. From the finely chopped fresh parsley garnish to the way the cheese clings to the curves of the dough, every detail is engineered for maximum flavor and visual impact.
Whether you are looking for a quick weeknight dinner that the kids will actually finish or a high-protein snack for game day, these Cheeseburger Rollups deliver. They are designed to be eaten with your hands, offering a satisfying crunch followed by a melty, savory center. Let’s dive into the culinary science and techniques required to master this recipe in your own kitchen.
The Irresistible Allure of Flaky Cheeseburger Rollups
- Textural Contrast: Experience the interplay between the crisp, golden-brown exterior of the crescent dough and the tender, crumbly seasoned ground beef inside.
- Visual Masterpiece: The bright yellow cheddar cheese creates a stunning visual contrast against the matte black plate, making these rollups the star of any spread.
- Gourmet Simplicity: Achieve professional-level results with accessible ingredients, elevated by specific searing and rolling techniques.
- Aromatic Freshness: The addition of finely chopped parsley provides a burst of color and a fresh, herbaceous finish that cuts through the richness of the beef and cheese.
Essential Ingredients for Success
Lean Ground Beef (80/20 Blend): We recommend a 1 lb (454g) portion of ground beef with a slightly higher fat content to ensure the filling remains juicy and flavorful after searing. The fat renders out during the cooking process, leaving behind a “dark brown, crumbly” texture that is essential for the filling.
Refrigerated Crescent Roll Dough: You will need 2 cans (8 oz/226g each) of high-quality crescent dough. This provides the “visible layers” mentioned in our visual blueprint, creating a light, airy structure that puffs beautifully in the oven.
Sharp Yellow Cheddar Cheese: Use 1 cup (115g) of freshly shredded or thick-sliced sharp cheddar. The “bright yellow” color is iconic for cheeseburgers, and using a high-fat cheddar ensures it achieves that “draped” look as it melts over the warm rolls.
Fresh Italian Flat-Leaf Parsley: A small bunch (about 15g) of fresh parsley is vital for the garnish. It must be “finely chopped” to distribute evenly across the rollups, providing that “bright green” pop of color.
Yellow Onion and Garlic: One small onion (100g) and 2 cloves of garlic are the foundational “invisible” ingredients. They provide the aromatic base that elevates the beef from simple meat to a complex burger filling.
Worcestershire Sauce and Smoked Paprika: These additions provide the deep color and savory “burger” flavor profile. They help the beef achieve that specific “dark brown” hue during the searing process.
High-Heat Cooking Oil: 1 tbsp (15ml) of avocado or vegetable oil is necessary to sear the beef properly without burning. This facilitates the Maillard reaction, which is the chemical process responsible for the browned, savory crust on the meat.
Sea Salt and Cracked Black Pepper: Never underestimate the power of seasoning. These are required to draw out the natural flavors of the beef and balance the sweetness of the dough.
Necessary Kitchen Equipment
Heavy-Bottomed Skillet: A cast-iron or stainless steel skillet is preferred for browning the beef. These materials hold heat exceptionally well, ensuring the meat crumbles and browns rather than steaming in its own juices.
Baking Sheet with Parchment Paper: To achieve a “golden-brown” bottom without sticking, a light-colored aluminum baking sheet lined with parchment paper is the gold standard.
Sharp Chef’s Knife: Essential for “finely chopping” the parsley and dicing the aromatics. A dull knife will bruise the parsley, turning it dark green and soggy rather than “bright green” and vibrant.
Wire Cooling Rack: Allowing the rollups to rest for 2 minutes on a rack prevents the bottoms from becoming soggy due to trapped steam.
The Step-by-Step Path to Golden-Brown Perfection
Preparing the Savory Beef Filling
Heat your skillet over medium-high heat with 1 tbsp (15ml) of oil. Once the oil shimmers, add your 1 lb (454g) of ground beef. Use a wooden spoon to break the meat into small, uniform crumbles as it cooks.
Stir in your diced onion and minced garlic. Season generously with salt, pepper, smoked paprika, and a dash of Worcestershire sauce. Continue cooking until the moisture has evaporated and the beef achieves a deep “dark brown” color. Drain any excess fat to prevent the dough from becoming greasy.
Mastering the Art of the Roll
Preheat your oven to 375°F (190°C). Unroll the crescent dough and separate it into triangles. For more “visible layers,” you can slightly overlap two triangles to create a larger surface area before rolling.
Place approximately 2 tbsp (30g) of the beef mixture at the wide end of each triangle. Carefully roll the dough toward the point, ensuring the beef stays tucked inside the center. The “crumbly” beef should be visible at the ends of the rolls, just like in our visual blueprint.
Baking for Texture and Color
Arrange the rollups on your prepared baking sheet, leaving at least 2 inches (5cm) of space between them for air circulation. Bake for 12-15 minutes. Watch for the sensory cue of a “golden-brown” crust and the smell of toasted butter.
In the final 2 minutes of baking, remove the tray and drape your “bright yellow” cheddar cheese over the top of each rollup. Return to the oven just until the cheese is “melted and clinging to the curves” of the dough. Do not overcook, or the cheese will lose its vibrant color and become oily.
The Final Flourish: Garnishing and Presentation
Once removed from the oven, immediately sprinkle the “finely chopped, bright green fresh parsley” over the hot cheese. The residual heat will help the parsley stick to the melted cheddar. For the best visual impact, serve these on a matte black plate to make the colors pop.
Expert Tips for Culinary Excellence
- Avoid the “Soggy Bottom”: Ensure your beef mixture is completely cooled and drained before placing it on the dough. If the meat is too hot, it will begin to melt the dough fats prematurely, leading to a gummy texture.
- Layering the Cheese: If you want an even more indulgent result, place a small pinch of cheese *inside* the roll with the beef, then follow the instructions to drape more cheese over the top for that “visual blueprint” look.
- Uniformity Matters: Use a cookie scoop to portion the beef. This ensures every rollup cooks at the same rate and looks identical on the serving platter.
- The “Glossy” Secret: For an extra-shiny, golden-brown finish, brush the dough with a simple egg wash (one egg beaten with 1 tsp of water) before baking.
The Science of Storage and Reheating
These Cheeseburger Rollups are best enjoyed fresh, but they can be stored in an airtight container in the refrigerator for up to 3 days. To maintain the “soft, golden-brown” texture of the dough, avoid the microwave when reheating.
For the best results, reheat in a 350°F (175°C) oven or air fryer for 5-7 minutes. This will recrisp the pastry layers and remelt the cheese without making the dough rubbery. If you are a fan of savory treats, you might also enjoy our prosciutto wrapped mozzarella for your next gathering.
What to Serve with Cheeseburger Rollups
To turn these rollups into a full meal, pair them with sides that offer a crunchy or acidic contrast. A crisp side salad or some garlic parmesan roasted potatoes are excellent choices that complement the rich beef and cheese.
If you’re hosting a party, consider a “sweet and salty” dessert to follow the savory main, such as salted caramel pretzel cheesecake balls. The contrast between the savory burger flavors and a sweet finish is always a crowd-pleaser.
Frequently Asked Questions
Yes, you can prepare the beef filling up to 24 hours in advance. However, do not assemble the rollups until you are ready to bake, or the dough may become soggy from the moisture in the beef.
While sharp yellow cheddar provides the classic look and drape, you can use Monterey Jack for better meltability or Pepper Jack for a spicy kick.
Keep the dough refrigerated until the exact moment you are ready to roll. If the dough becomes too warm, the butter layers soften, making it sticky and prone to tearing.
To maintain the crispy exterior, reheat in an air fryer at 350°F (175°C) for 3-5 minutes or in a standard oven. Avoid the microwave to prevent the dough from becoming chewy.
This usually happens if the beef is too dry or the crumbles are too large. Ensure you finely crumble the meat during searing and use a small amount of cheese inside the roll to help ‘glue’ the meat together.
The Ultimate Cheeseburger Rollups Recipe
Cheeseburger Rollups: The Ultimate Golden-Brown Crescent Roll Hack
Ingredients
Equipment
Instructions
- In a heavy skillet over medium-high heat, cook ground beef and onion until the beef is dark brown and crumbly, about 7-8 minutes.
- Add minced garlic, Worcestershire sauce, salt, and pepper. Cook for 1 more minute then drain excess fat.
- Unroll crescent dough into triangles. Place 2 tbsp of beef at the wide end and roll toward the point.
- Place on a parchment-lined sheet. Bake at 375°F (190°C) for 12-15 minutes until golden-brown.
- Drape cheddar cheese over rolls in the last 2 minutes of baking. Top with finely chopped parsley before serving.
Notes
Wait 2 minutes before serving to let the cheese set.
Bring the Burger Joint Home
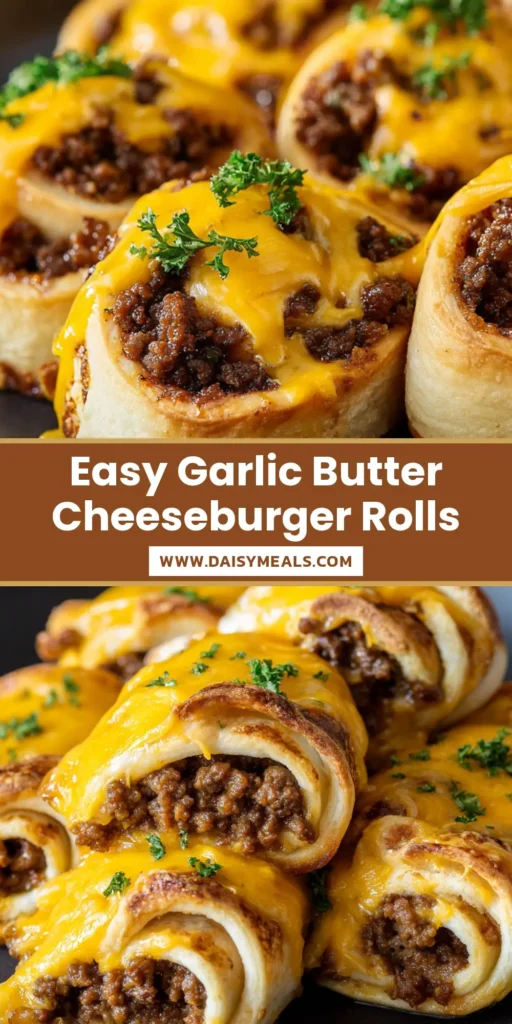
These Cheeseburger Rollups are more than just a quick meal; they are a testament to how simple ingredients, when treated with the right culinary techniques, can create something truly extraordinary. The combination of “golden-brown” dough, “crumbly” beef, and “bright yellow” cheese is a timeless trio that never fails to satisfy.
We invite you to try this recipe and share your results! Did your cheese drape perfectly? Did you get those beautiful visible layers in the dough? Let us know in the comments below. For more visual inspiration and easy weeknight meals, be sure to follow us on Pinterest and save this recipe to your favorite boards!