Welcome to the only gluten free crepe recipe you will ever need. If you’ve been dreaming of delicate, paper-thin crepes that are wonderfully flexible and never tear, you’ve found your answer. This recipe is completely foolproof, delivering a perfect batter that cooks into beautifully tender crepes, ready for any sweet or savory filling you can imagine. Forget any past experiences with gummy or brittle results; these are the real deal.
We’ve tested this recipe relentlessly to ensure it works every time, using a simple, accessible gluten-free flour blend. Whether you’re making a special brunch, a quick weeknight dinner, or an elegant dessert, these GF crepes provide the perfect, delicious canvas.
Why You’ll Love This Gluten Free Crepe Recipe
- Perfect Texture: These crepes are soft, pliable, and have those classic lacy edges. They hold up beautifully to fillings without cracking or tearing.
- Incredibly Easy: The batter comes together in just minutes in one bowl or a blender. The process is simple and straightforward, even for beginners.
- Amazingly Versatile: Keep them simple for a sweet breakfast or load them up for a savory dinner. This single batter recipe works perfectly for both. For ideas, check out our guide to the perfect sweet crepe recipe (coming soon).
- Dietary-Friendly: Naturally gluten-free and easily made dairy-free with one simple swap!
- Make-Ahead Friendly: The batter can be made ahead, and cooked crepes store and freeze beautifully, making them perfect for meal prep.
Key Ingredients for Perfect GF Crepes
The magic of this recipe lies in using a few high-quality, simple ingredients. Getting these right is the key to that perfect crepe texture.

The Best Gluten-Free Flour for Crepes
The most crucial ingredient is your gluten-free flour. For consistent, reliable results, I strongly recommend using a high-quality “cup-for-cup” or “1-to-1” all-purpose gluten-free baking flour. These blends are specifically formulated to replace regular flour in recipes and already contain xanthan gum, which is essential for providing the elasticity and structure that gluten normally would. My preferred brands are Bob’s Red Mill 1-to-1 Baking Flour or King Arthur Measure for Measure.
Using a blend without xanthan gum will result in crepes that fall apart. If your blend doesn’t contain it, you’ll need to add about 1/2 teaspoon.
Other Essential Ingredients
- Eggs: Provide structure, richness, and binding. Large eggs at room temperature work best.
- Milk: Adds moisture and flavor. Whole milk gives a richer result, but any milk works. For a dairy-free version, use an unsweetened plain plant-based milk like almond or oat milk.
- Melted Butter: Adds flavor and contributes to a tender, non-stick texture. You can use dairy-free butter or a neutral oil like avocado oil as a substitute.
- Granulated Sugar: Just a tablespoon adds a hint of sweetness that works for both sweet and savory fillings without making the crepe overtly sweet. You can omit it for purely savory applications if you prefer.
- Vanilla Extract & Salt: These are flavor enhancers. A pinch of salt balances the flavors, and vanilla adds a lovely warmth, perfect for sweet crepes.
How to Make Gluten Free Crepes (Step-by-Step)
Making the batter is the easy part! The keys to success are a smooth consistency and allowing the batter to rest. Follow these simple steps for perfect results.
Step 1: Combine the Wet Ingredients
In a large mixing bowl, whisk together the eggs, milk, and melted butter until they are well combined and frothy. Whisking the eggs well first helps ensure a smooth final batter.
Step 2: Add the Dry Ingredients
Add the gluten-free flour blend, sugar, and salt to the wet ingredients. Whisk vigorously until the batter is completely smooth and free of lumps. Alternatively, you can combine all ingredients in a blender and blend for 20-30 seconds until perfectly smooth.
Step 3: Rest the Batter (This is a non-negotiable step!)
Cover the bowl and let the batter rest in the refrigerator for at least 30 minutes, or up to 24 hours. This allows the gluten-free flours to fully hydrate, which is critical for creating a pliable, non-gummy texture. The batter will thicken slightly as it rests.

Step 4: Cook the Crepes
- Heat the Pan: Place an 8 or 10-inch non-stick skillet or crepe pan over medium-low heat. The pan is ready when a drop of water sizzles and evaporates quickly.
- Grease the Pan: Lightly grease the pan with a small amount of butter or oil for the first crepe. You may not need to re-grease for subsequent crepes if you have a good non-stick surface.
- Pour and Swirl: Pour about 1/4 cup of batter into the center of the hot pan. Immediately lift the pan off the heat and swirl it in a circular motion to spread the batter into a thin, even layer.
- Cook: Return the pan to the heat and cook for 60-90 seconds, or until the edges begin to lift and turn golden brown and the surface appears matte, not shiny.
- Flip: Gently slide a thin spatula under the edge of the crepe to loosen it. Use your fingers or the spatula to quickly flip it over. Cook for another 30 seconds on the second side.
- Repeat: Slide the finished crepe onto a plate. Repeat the process with the remaining batter, stacking the cooked crepes on top of each other. The stack will keep them warm and soft.
Tips for Success: Secrets to the Best GF Crepes
- Check Batter Consistency: After resting, the batter should have the consistency of heavy cream. If it seems too thick (which can happen with different GF flour blends), whisk in another tablespoon or two of milk until it reaches the right consistency.
- Master the Swirl: The quick wrist swirl is the key to getting paper-thin crepes. The faster you can spread the batter, the thinner your crepe will be.
- Use the Right Pan: A quality non-stick skillet is your best friend here. A dedicated crepe pan is great but not necessary.
- Control the Heat: Heat that is too high will cook the crepe before you can swirl it thin and may cause it to burn. Medium-low is the sweet spot. Adjust as you go.
Common Problems & Troubleshooting
Even the best recipes can have hiccups. Here’s a quick guide to fixing common gluten-free crepe issues.
| Problem | Reason | Solution |
|---|---|---|
| Crepes are tearing when flipping. | Batter may be too thin, the crepe is undercooked, or your flour blend lacks a binder. | Ensure you’re using a blend with xanthan gum. Let the crepe cook until the edges are clearly lifting and the top is dry before attempting to flip. |
| Crepes are too thick and doughy. | The batter is too thick, or too much batter was used in the pan. | Whisk 1-2 tablespoons of milk into your batter to thin it to the consistency of heavy cream. Use a measuring cup (like 1/4 cup) for consistent amounts. |
| Crepes have a gummy texture. | The batter was not rested long enough. | Always rest the batter for at least 30 minutes. This step is crucial for gluten-free flours to absorb the liquid properly. |
Filling and Serving Ideas
The beauty of crepes is their versatility! They can be a simple breakfast or a show-stopping dessert.
Sweet Crepe Fillings
- Classic: A sprinkle of granulated sugar and a squeeze of fresh lemon juice.
- Nutella & Banana: The iconic combination of chocolate-hazelnut spread with sliced bananas.
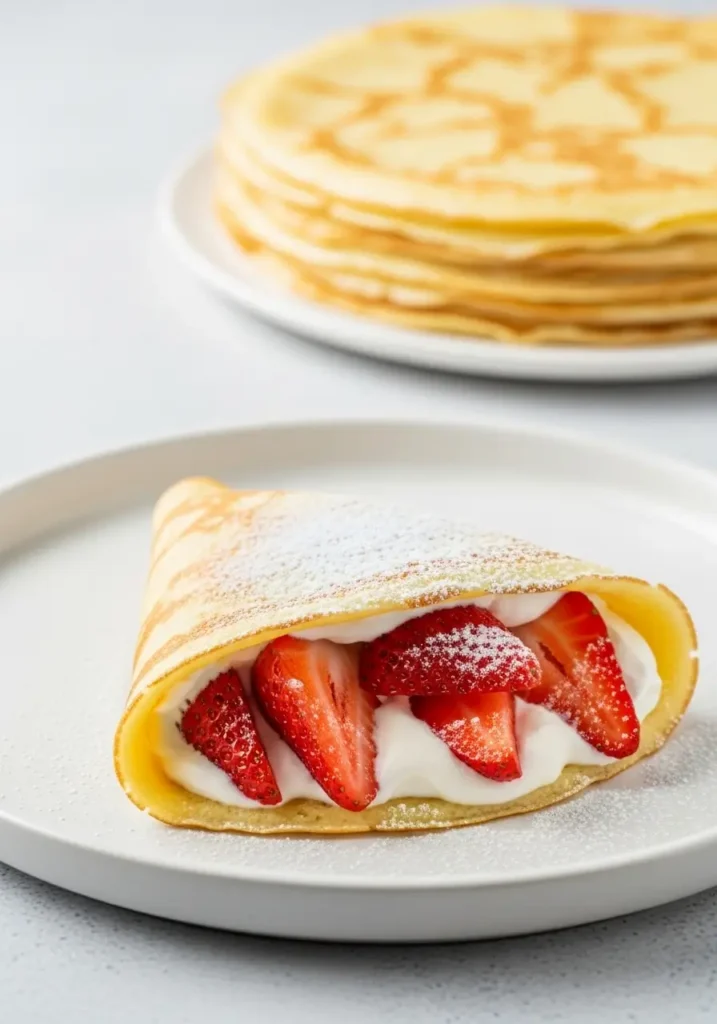
- Berries & Cream: Fresh mixed berries with a dollop of whipped cream or sweet cream cheese.
- Cinnamon Sugar: A simple spread of softened butter topped with a mix of cinnamon and sugar, rolled up tight.
Savory Crepe Fillings
For savory crepes, you can omit the sugar and vanilla from the batter if you like. They make a fantastic base for a meal, similar to a classic French buckwheat galette.
- Ham & Cheese: A slice of ham and a sprinkle of Gruyère or Swiss cheese, folded and warmed until melted.
- Creamy Chicken & Mushroom: A classic filling that turns crepes into a hearty dinner.
- Spinach & Ricotta: Sautéed spinach mixed with ricotta cheese, garlic, and a pinch of nutmeg.
- Breakfast Style: Scrambled eggs, crumbled bacon, and cheddar cheese. For more ideas, see our ultimate savory crepe recipe.
Make-Ahead and Storage Instructions
- To Store Batter: The batter can be stored in an airtight container in the refrigerator for up to 2 days. Give it a good whisk before using.
- To Store Cooked Crepes: Stack cooked crepes with a small piece of parchment paper between each one to prevent sticking. Store in a zip-top bag or airtight container in the refrigerator for up to 3 days.
- To Freeze Crepes: Stack the crepes with parchment paper in between, then wrap the entire stack tightly in plastic wrap and place in a freezer-safe bag. They can be frozen for up to 2 months. Thaw in the refrigerator or at room temperature before gently reheating.
Frequently Asked Questions About Gluten Free Crepe Recipe
Yes, absolutely! To make these crepes dairy-free, simply substitute the milk with your favorite unsweetened plant-based milk (almond, oat, or soy work well) and use melted dairy-free butter or a neutral oil like avocado oil.
There are three keys to preventing tearing: 1) Rest the batter for at least 30 minutes. 2) Make sure your pan is heated properly over medium-low heat. 3) Don’t flip the crepe too early! Wait until the edges are golden and lifting from the pan and the top surface looks dry or matte.
The best choice is a high-quality ‘1-to-1’ or ‘cup-for-cup’ all-purpose gluten-free flour blend that already contains xanthan gum. Brands like Bob’s Red Mill 1-to-1 or King Arthur Measure for Measure provide excellent, consistent results and create a pliable texture.
The batter should be quite thin, with a consistency similar to heavy cream or pouring cream. This allows it to spread easily into a thin layer in the pan. If your batter seems too thick after resting, whisk in more milk, one tablespoon at a time, until you reach the right consistency.
The Best Gluten Free Crepe Recipe

Gluten Free Crepe Recipe (Easy, Foolproof & Delicious!)
Ingredients
Equipment
Instructions
- In a large bowl, whisk the eggs, milk, melted butter, and vanilla extract until well combined. Add the gluten-free flour blend, sugar, and salt. Whisk vigorously until the batter is completely smooth. For an even smoother batter, you can blend all ingredients in a blender for 30 seconds.
- Cover the bowl and refrigerate for at least 30 minutes or up to 24 hours. This allows the flour to fully hydrate, which is essential for the best texture. The batter will thicken slightly as it rests.
- After resting, give the batter a quick whisk. It should have the consistency of heavy cream. If it’s too thick, add more milk, one tablespoon at a time, until it reaches the right consistency.
- Heat an 8 or 10-inch non-stick skillet over medium-low heat. Lightly butter the pan for the first crepe. Pour about 1/4 cup of batter into the center of the pan and immediately lift and swirl the pan to spread the batter into a thin, even circle.
- Cook for 60-90 seconds, until the edges are golden and lift easily from the pan. The surface should look matte. Gently loosen with a spatula and flip, cooking for another 30 seconds on the other side.
- Slide the crepe onto a plate and repeat with the remaining batter, stacking them as you go. Fill with your favorite sweet or savory fillings and enjoy immediately.
Notes
Dairy-Free Option: To make these dairy-free, use a neutral oil or dairy-free butter substitute and your favorite unsweetened plant-based milk (almond or oat work well).
Storage: Store cooked crepes separated by parchment paper in an airtight container in the fridge for up to 3 days or in the freezer for up to 2 months.
Share Your Creations!
I hope you love this easy and foolproof gluten free crepe recipe as much as I do! If you try it, please leave a comment below and let me know your favorite way to fill them. And don’t forget to save this recipe to your favorite board on Pinterest!